• You liked BFD7 now you should join this forum and of course become a club member to see what CCA is all about.
  • Thank you to everyone who registered and showed up for the BIG Fish Deal #7.

250 Gallon Build Thread

davidhusker

Members
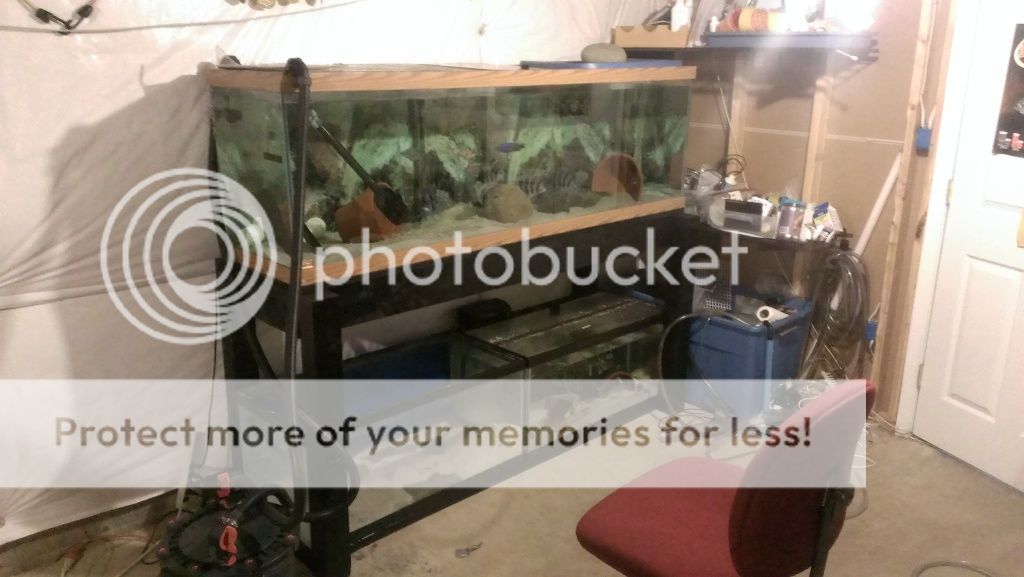
Yesterday morning I tried to tackle the task of moving this tank from my garage to my basement. I built the cart it is sitting on with 2x4 and some 5" swivel wheels. I was not really sure if it would hold up, as it had already broken once when we picked this tank up.

With just myself and my wife I pushed it out of the garage and everything was going smoothly until we hit grass. The wheels immediately dug into the ground and popped the screws out of the wood essentially ripping off a wheel. I had figured this was going to happen, but wanted to try it anyhow. So because I couldnt lift it from the ground by myself I did what any other american would do and used a car jack to lift it enough to fit my dolly underneath. Remember nothing is touching glass, the original "cart" almost acted like a wood crate around the tank so it worked out. After about 30-40 mins I got dollys under each end and off we pushed through the grass. Since carts dont just magically turn I had to stop every 5 feet or so pulling the carts to turn them. It was a crazy mess but we finally ended up in the house. I am having a couple friends come by Saturday to help get it on the stand safely.

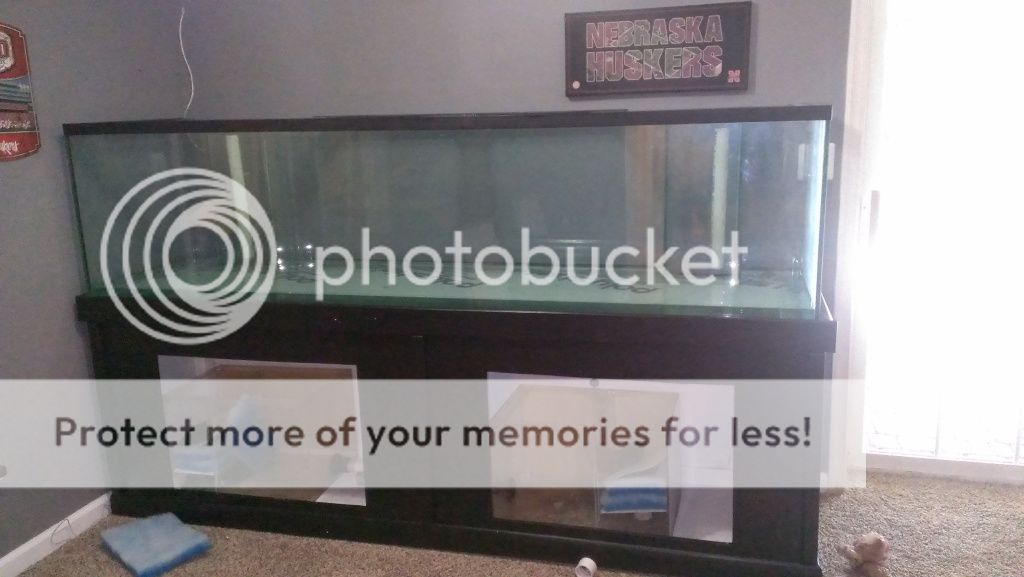
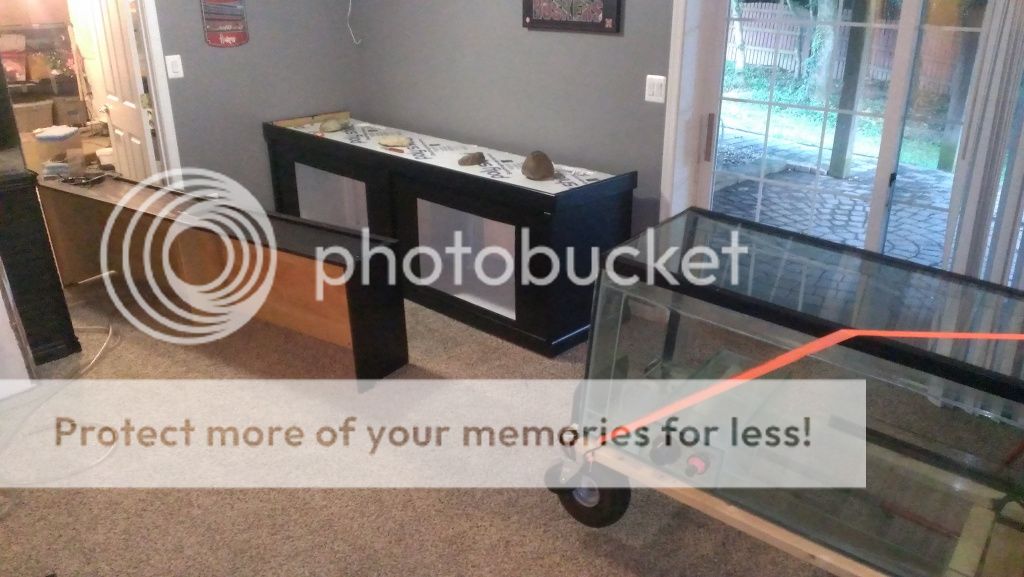
Basements filling up with fish toys now..

IMAG0435.jpg


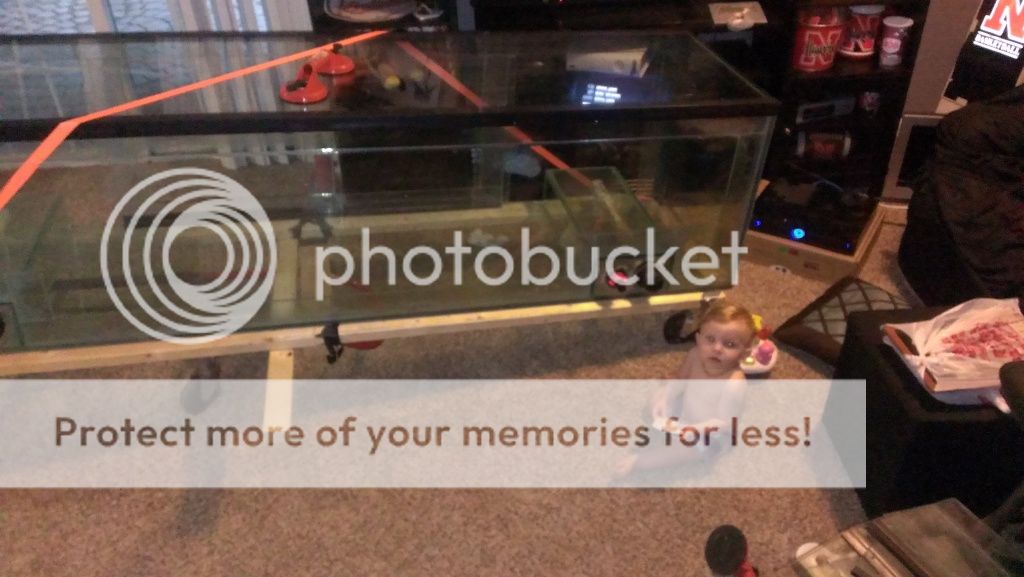
Also had my little helper. I keep telling my wife it is his swimming pool and not a fish tank.

IMAG0437.jpg


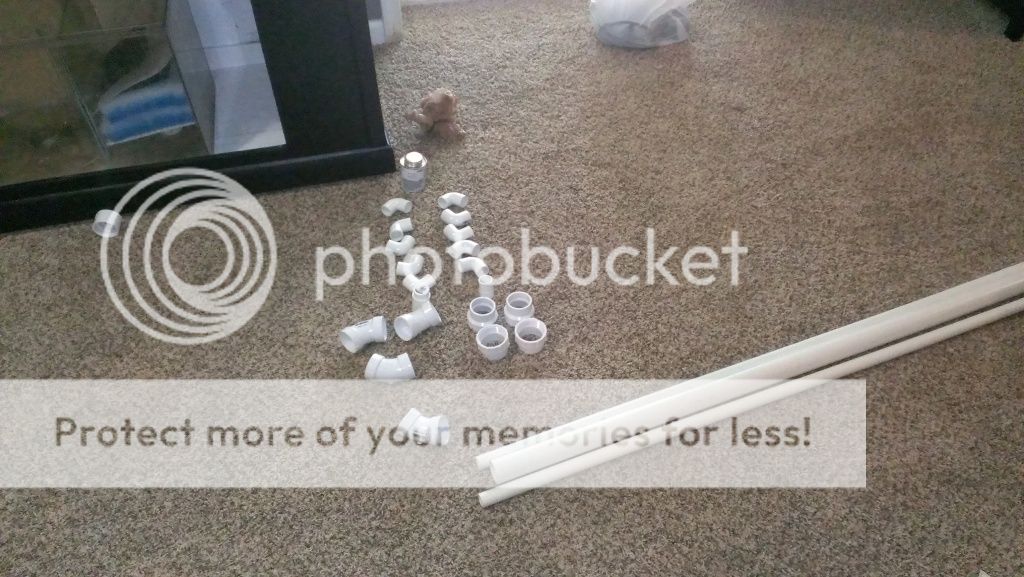
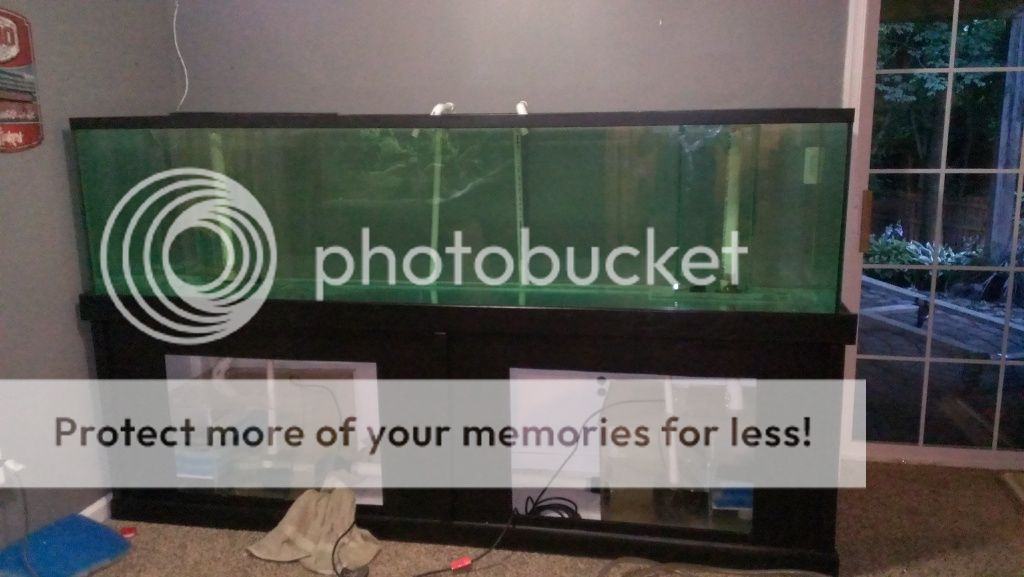
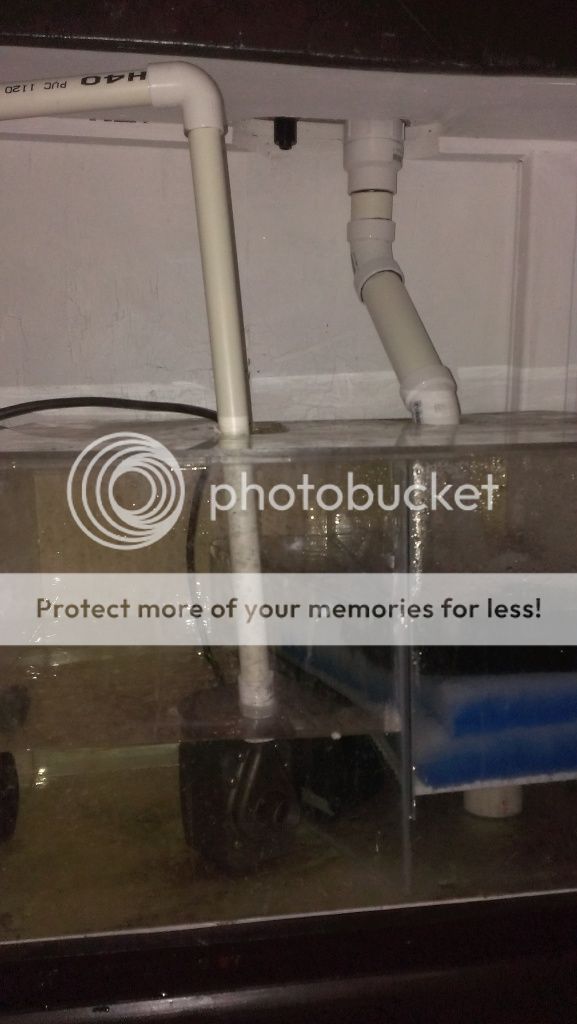
I have a little bit more to do once it is on the stand and one more trip to home depot to get some tubing and pvc and attach the pumps up. Then I will test fill and keep you all updated as I go. I got the 7ft 210 sold and out of the house. Soon I will be moving the 180 back into the storage/fish room after this 250 is done.
 

davidhusker

Members
You can also see in the last pictures that I also got the styro fitted on the stand. I got the stand leveled off and ready.

Also I plugged one hole on each overflow box with the pvc plug things at home depot. I also siliconed them just to be sure. The previous owner had these plumbed as returns. It sounds a little crazy but essentially they had tubing coming up through a pvc pipe and into the tank. It is a good idea, but they had to be cut and I don't feel like messing with them. My return lines will just come around the back of the stand and tank.

I will be buying some new fake plants to try and "hide" the overflow boxes and I am ordering a new paper background for the tank. Didnt feel like painting it as it would have been my first time painting a background and I don't think I want to risk that on my new "show" tank. Maybe down the road...

Here is what's going on in the fish room through that door...
I built and painted a new stand for the 125 and modified it so that the 40 breeders can sit underneath on 2x2's. I wanted them off the ground as concrete can get chilly. The FX5 was sold with the 210. The tanks are now all running off of sponges with an additional AC110 on the 125 gallon. The 180 will sit perpendicular to these making an "L" shape. The 180 will house my fronts. The 40's and 125 will be for breeding and growouts.

IMAG0312.jpg
 

Tony

Alligator Snapping Turtle/Past Pres
Pretty nice, David.

I can picture myself outside on the grass, right after the wheel broke off. Not sure how patient I (or my wife) would have been at the point, lol.
 

Andrewtfw

Global Moderators
This is a great thread. Thanks for taking the time to write up your experiences and for including pics.
 

davidhusker

Members
No photos, but I messed around for a few minutes today cleaning pumps. Obviously I am a little skeptical of the pumps that came with the tank due to the condition it was in. However I read a lot on reefcentral and those guys swear by vinegar/water mix in cleaning pumps. So I setup a 5 gallon bucket and let them soak 15 minutes then ran them all a minute or so in the water and then ran them in clean hot water to rinse.

I am glad I did. The setup came with some awesome coralife lights. Both had burnt bulbs and bad ballasts so not worth my money to replace. So I was excited to see the Mag 9.5 pump churning water. It was a lot more powerful than my own personal QuietOne (650gph) so I am satisfied that it is fully functional.

So tomorrow morning the tank will be getting its first test fill and I will be setting up the plumbing and return lines from the sumps. Hopefully it goes smooth.

After the test fill I will be transferring the sand, water, and decorations along with 2 filter pads of the 180 over into this tank. No cycle time should be needed and the fish will be basically moving tanks. Now that I think of it I probably will need to go buy another bag of sand.

I plan on putting a couple random fish in the tank before my show tank moves in. I would hate for some fungus from the overflow box that I couldnt reach somehow wipe out my show tank. But I think within the next week this whole build will be complete.
 

davidhusker

Members
Got it setup. Still working on the filtration stuff now but it feels good to have it in place. When I built the stand it was 1/4" unlevel. When I set it up down here it was 3/4" off. I had to end up putting an entire 2x2 board under the right side because it just sinks into the carpet a little. But anyhow it worked out. It's **** near perfectly level. It was very tough getting the tank to go on the stand with the styro. The bulkheads kept ripping the styro. It only took about 30 mins but if there was no styro it would have been a 10 minute lift.

IMAG0438.jpg


Going to hard plumb the whole thing with PVC. I decided against ball valves. I have ball valves plumbed into my sump on the 180 and have never used them in 5 years. PVC is easy to cut and replace so we'll see.

Please ignore the non-background, it's on its way

IMAG0439.jpg
 

londonloco

Members
Dude, ever have 100 gallons of water leak in your house, I have, not fun. Ball valves are cheap, and if you ever need them, they are in place. I wouldn't skip em, especially since it looks like your tank is in the main house on carpet.
 

davidhusker

Members
Dude, ever have 100 gallons of water leak in your house, I have, not fun. Ball valves are cheap, and if you ever need them, they are in place. I wouldn't skip em, especially since it looks like your tank is in the main house on carpet.

But the overflow box is the only thing that would reach the valve anyways, maybe 6 gallons.

How would a ball valve help a leaking tank? The water all flows into the box. So worst case it does leak and I lose about 6 gallons of water on my floor and maybe a broken water pump. If 100 gallons is leaking somewhere thats going to be from a tank seal.

And as you said, if I ever need them they are there, what exact purpose would a valve serve?
 

Andrewtfw

Global Moderators
I guess a ball valve coming off each pump would help ensure both returns are at about the same rate. They woukd also help if the return pumps were too strong. Otherwise I don't see a need.

I do suggest putting an elbow on the intake of each pump. This would allow for a lot of evaporation to occur while reducing the chance of the pumps running dry.

Lastly, I suggest drilling a hole in the returns to kill any chance of a significant back siphon if the power cuts out.
 

londonloco

Members
Andrew types faster than I do, like he said, a valve (I use gate valves on returns) would insure both returns flow at the same rate. A ball valve below the inflows to the sump would stop 6 gallons from flooding your sump. With all that said, I have all the above on my fw 125, and like you, have never had to use it. The one time I did have a flood involved a canister filter, hose popped, and I did have 100 gallons of water on my oak floors. Def sucked....
 

davidhusker

Members
I guess a ball valve coming off each pump would help ensure both returns are at about the same rate. They woukd also help if the return pumps were too strong. Otherwise I don't see a need.

I do suggest putting an elbow on the intake of each pump. This would allow for a lot of evaporation to occur while reducing the chance of the pumps running dry.

Lastly, I suggest drilling a hole in the returns to kill any chance of a significant back siphon if the power cuts out.


True. But the sumps are connected so they do not need to be at the same flow rate. Either way, I got the tank filled all the way up and the left side is still like 1/32" higher. It is ridiculous that such a small amount makes such a difference. There is literally water sitting on top of the overflow just not falling in, and the other side is filled and already running. Im going to shim some more and then I can test out the plumbing and make any changes based on that.
 

davidhusker

Members
I do suggest putting an elbow on the intake of each pump. This would allow for a lot of evaporation to occur while reducing the chance of the pumps running dry.

I dont understand what you're saying here. Can you elaborate?

Lastly, I suggest drilling a hole in the returns to kill any chance of a significant back siphon if the power cuts out.

Ha I totally forgot to do that. When I was doing my test run it was trying to siphon both times i cut power. It never did as the level dropped below the return lines. I will add this in.
 

davidhusker

Members
Do you all think 1550 gph is too much flow on a 250 gallon tank? It's 6.2x turnover rate.

Based on what I have read I think it's almost perfect. Some people prefer less, some prefer more. I think I am going to leave everything as is and then if need be I can lower the flow rate on the Mag 9.5.

I glued all the pvc together and did a complete test run. Everything went great except for both of the 2" bulkheads in the sumps (that connect the sumps together). They are both tight but have a bad seal (previous owner install). I can see now why the entire stand was rotted. Both of them have a slow leak. The left one probably lost a whole 1/2 gallon of water or so in 20 mins. (I had a towel there so no cleanup). The right one was a very slow leak. I am going to just silicone them both today to seal them.

I am thinking about making a T off the of the return for the mag pump and having 2 return lines into the tank but will see what parts I have left.

Anyhow here are some photos.

IMAG0441.jpg


I am going to have a background so you will not see the return pipes coming up. However the white PVC pipes in the overflow box will be visible. I have contact Glass Cages to see what they charge for their cover boxes. At this point though I am not going to be putting them in before setting the tank up. If it bothers me that much I will have to fix it then.

IMAG0442.jpg


This is the right sump, with the Mag 9.5. I have a couple modifications I need to make on BOTH sides. For one, I thought it might be nice to have the water "fall" into the sump to spread it out. That was a very dumb idea as it creates the noise of an amazon rainfall and splashes everywhere. Also you can see I cut acrylic sump covers. I am ordering intake parts for the pump itself.

31FkHIUgaeL.jpg


So once I get these items repaired and get the noise level down tonight, I will be putting in some sand and used filters from my 180 on tuesday as well as the background sheeting (the standard tape on stuff..). Wednesday I will put the fish and decorations in and be done with this for now.
 

davidhusker

Members
Also those returns that are actually in the tank are temporary. I have actual outflow pieces just havent cleaned them and put them on yet just if anybody looks at that and wonders why it looks bad.
 

Tony

Alligator Snapping Turtle/Past Pres
Looking great, David. I think that 6x turnover for your tanks is more than sufficient. How are your drains keeping up? If they're anywhere close to maxed, I'd dial back the pumps a hair to be safe.
 

davidhusker

Members
Looking great, David. I think that 6x turnover for your tanks is more than sufficient. How are your drains keeping up? If they're anywhere close to maxed, I'd dial back the pumps a hair to be safe.

They are 2" pipes and are doing fine. I think I might clock it down a hair. I decided I am going to go ahead and install a valve on the right side to slow it down a little.
 

Andrewtfw

Global Moderators
Regarding the elbow on the pump intake- placing an elbow on the intake with the elbow facing down will reduce the risk of running the sumps dry. Mag pumps are bulky and will suck in air when the water level is about an inch above the intake.
 
Top