• You liked BFD7 now you should join this forum and of course become a club member to see what CCA is all about.
  • Thank you to everyone who registered and showed up for the BIG Fish Deal #7.

250 Gallon Build Thread

davidhusker

Members
Figured I would start posting here some of the work I've started doing. I will give a small background on the story...

I was looking for a 300 gallon to replace my 210 and a 125 to try and cut back on maintenance. After a while I found this online and bought it (250 gal). I showed up at the house and it was by far one of the worst conditions of a home I've been in, much less the tank was in not a very good condition (it was a MESS) and it was in no way ready to be moved. I brought my neighbor and they had 4 or so guys/kids there. The house was like I was on an episode of hoarders. The sumps were still connected and about 30lbs of gravel was still in the tank! It was all algae and smelled bad (the tank). :angry3:

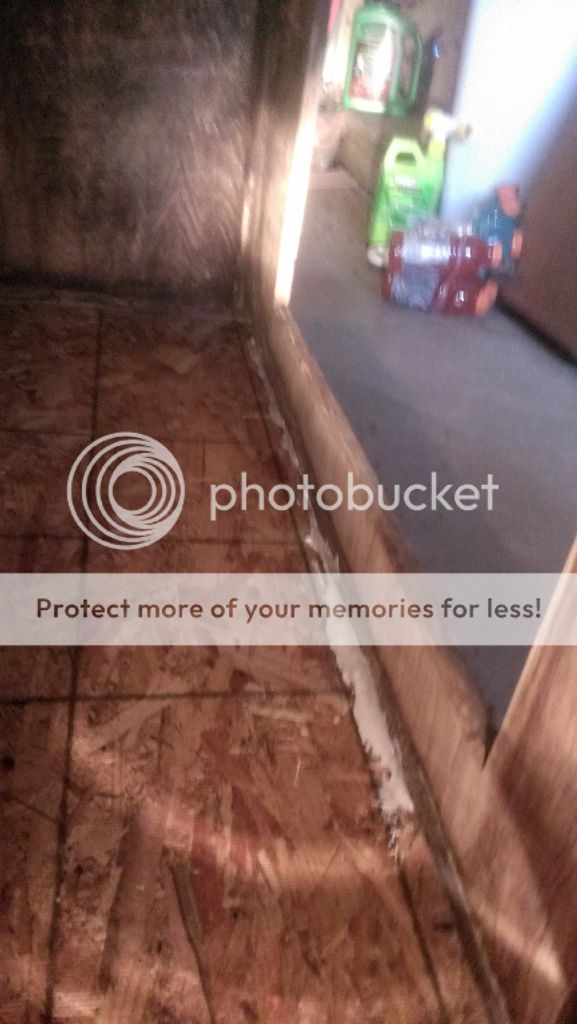
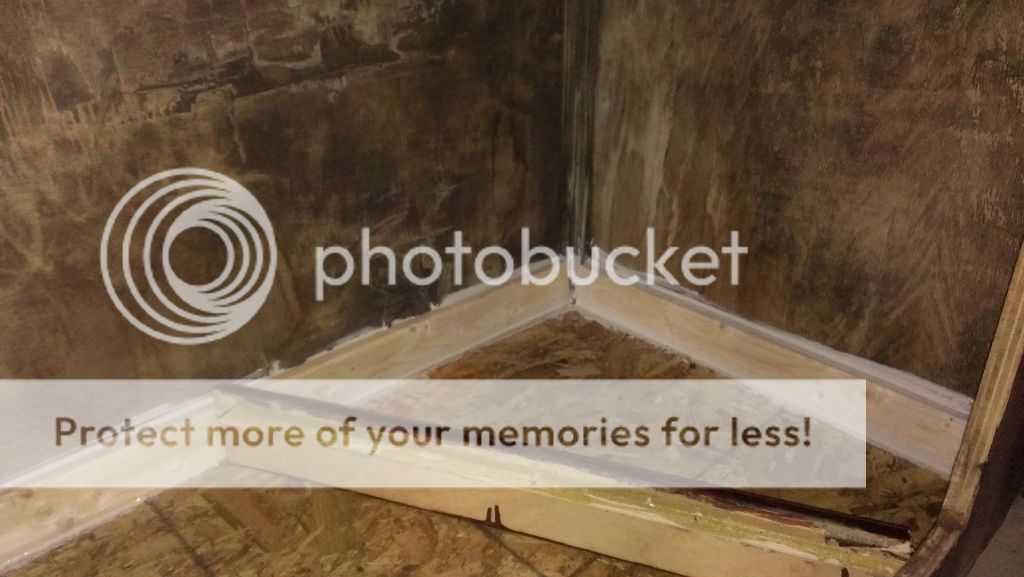
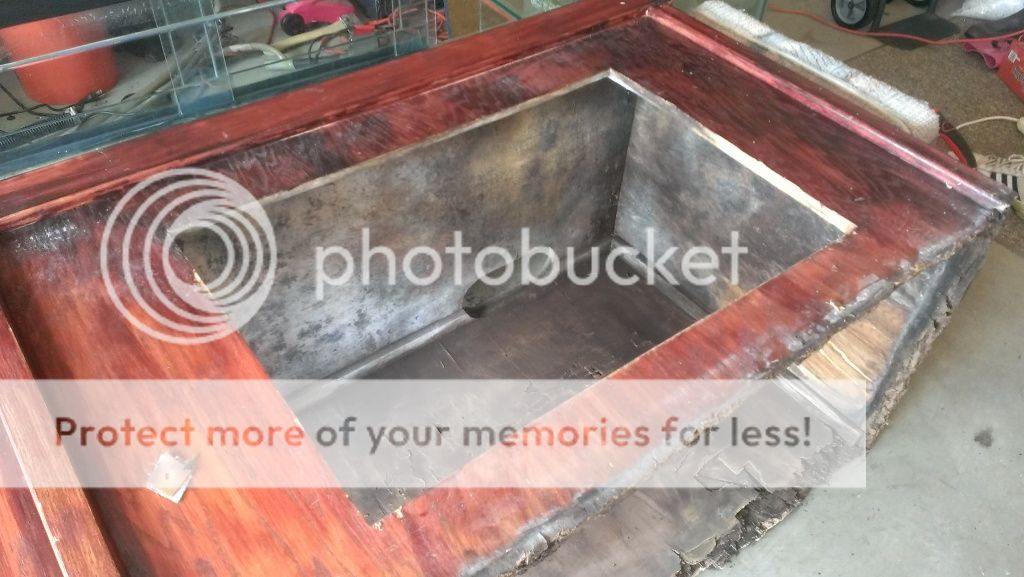
I figured I had already committed to the purchase and would go through with it knowing i have some work ahead of me. Long story short, after disconnecting PVC and stuff I see that the entire bottom of the stand is ROTTED! There is mold/black mold all over the inside where the sumps were. :angry3: Not to mention my neighbor and I had spent 2 hours at this house for a move that should have taken 30-40 mins. I tore off the bottom and left it.

So I was disappointed to say the least. But I do like a project.

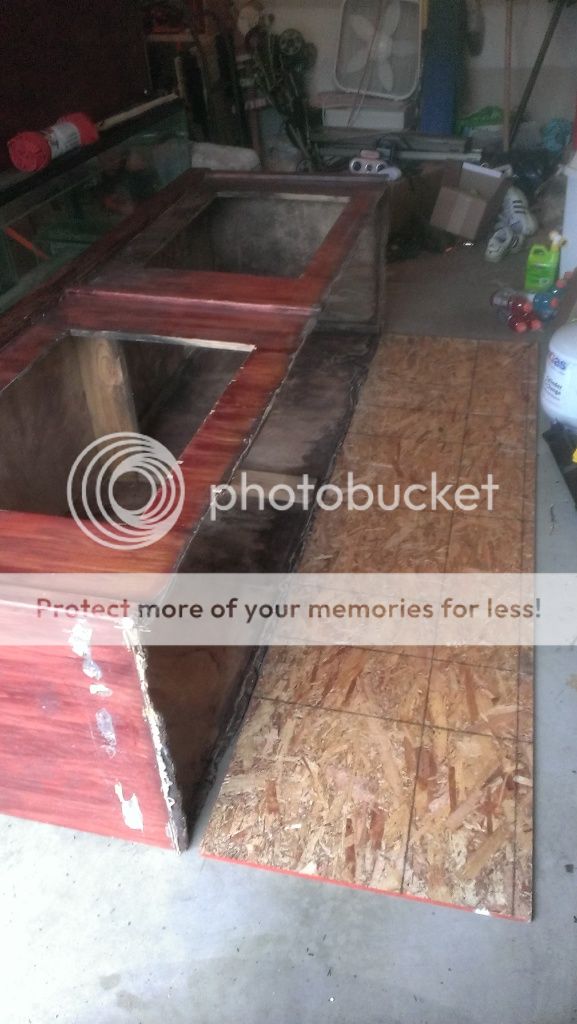
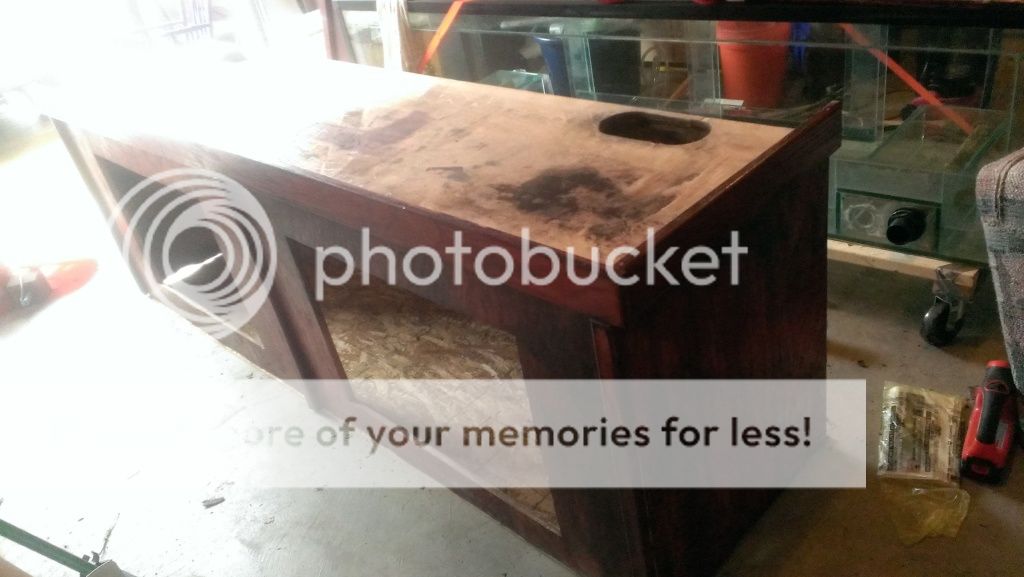
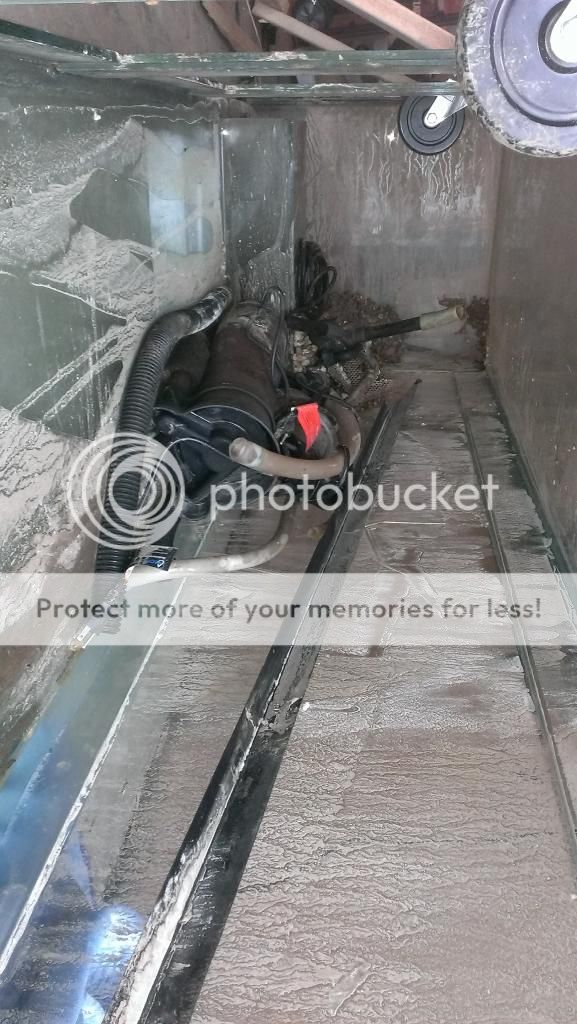
I dont have photos of the move but here it is in the garage. The tank had CHICKEN BONES and deceased fish bones, MUD/DIRT/POOP stacked on the bottom, algae all over... ugh.

dbedc4ca-8361-4f72-b2dd-87608f7a0619.jpg


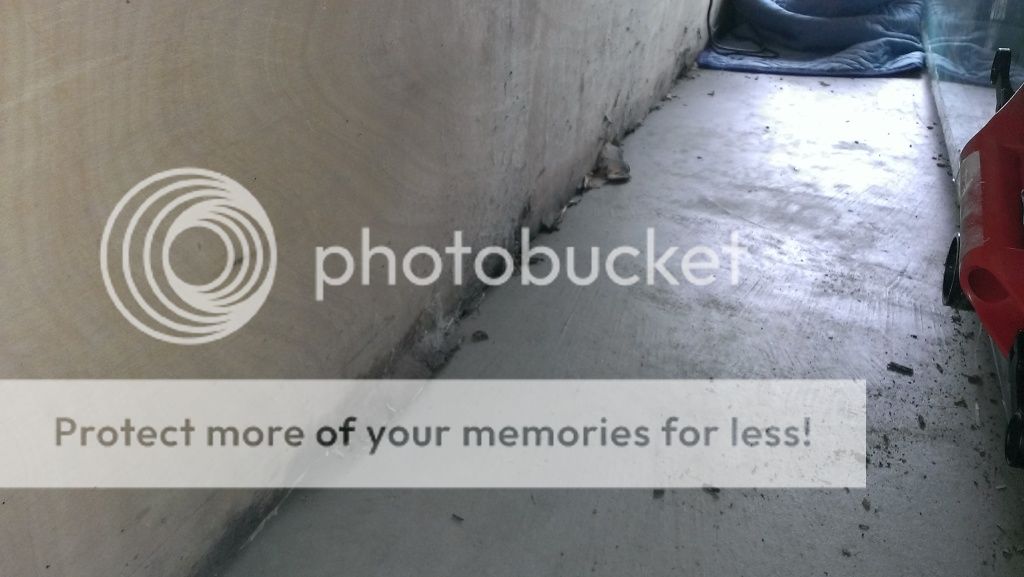
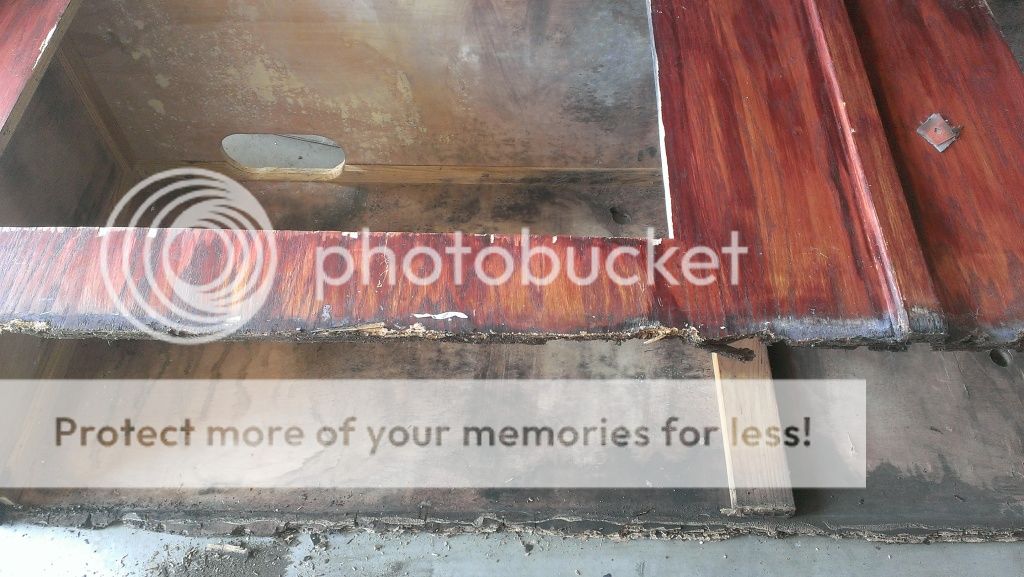
You can see around the bottom of all the Base of the stand is bad.. The rest is workable..

IMAG0323.jpg
 
Last edited:

davidhusker

Members
I took an entire day to clean the tank. It's 8x2x25". I put the glass on its side and used a scrub brush and some water/vinegar solution and went at it. It was a pain in the ***, especially the overflow boxes, but I did it. Unfortunately I did not take pictures of the after. But I will eventually.

I have been focusing on the stand at this point.

I know it will probably be against the judgment of most people that read this but I decided it is best for me to repair the stand that I have. Most of the wood is still good, but it's just mold and messy. I did the CRAZY task of sanding the entire inside, sanding the BLACK MOLD off. I wore a heavy mask but still caused me some chest soreness the next day. Ill probably get cancer... j/k. Anyhow after doing all that I ended up with this...

IMAG0349.jpg


Again you can see the bottom rot, goes up about 3 inches or so.

IMAG0351.jpg
 

davidhusker

Members
I am working to catch up on here to where I am at currently. But I think I'll save some for the suspense... Anyhow after the sanding was done I treated the stand interior completley with mold remover/water mix twice over. After I scrubbed that, I then treated the entire thing with a bleach/water mix to be sure the mold had seen its day.

I ran to Home Depot yesterday to buy the supplies needed to finish this stand off. I already had some KILZ waterproof mildew paint/primer but found some in a spray can so I figured that is easier.. I bought support wood, a bottom piece of cheap 1/2" plywood and liquid nails.

I decided that liquid nails would benefit me more than actual nails. This is because I am not confident in the state of the wood I would be hammering into. It's strong, but I don't want to risk it. Plus I read all over that liquid nails is stronger. So we'll find out. There will be nails/screws in this also, but liquid nails will be the main bond.
 

Jeff721

Members
Dude, throw that stand away. You're going to be putting over 2000 pounds on top of it. That's over a TON!

You've got no idea what's going on with the grain in the wood. You may never be able to get it level either. Not worth the risk. Shoot, come down to Accokeek and I will help you build a stand if it will keep you from putting that thing under 250 gallons of water.
 

dogofwar

CCA Members
+1

That stand is cashed... I'd build a new one from concrete blocks for a tank that big. You can face it with hardiboard / tile if you want to make it look nice..

Matt

Dude, throw that stand away. You're going to be putting over 2000 pounds on top of it. That's over a TON!

You've got no idea what's going on with the grain in the wood. You may never be able to get it level either. Not worth the risk. Shoot, come down to Accokeek and I will help you build a stand if it will keep you from putting that thing under 250 gallons of water.
 

Tony

Alligator Snapping Turtle/Past Pres
Sorry for the PITA project, Dave. In the end, it'll be worth it. Wish I had put in an 8' tank from the start in place of my 180, but the price was right at the time. :)
 

TMSB805

Members
Yikes!! i'd be scared to load a 250g on that. Do you have plans to reinforce the stand some how?

I remember when RichOne picked up his 210 the stand was crap. He ended up having to renforce it and its be fine since. Just something to think about.
 

davidhusker

Members
I am going to be adding a few 2x4's as support for each corner and also adding 1x3" around the entire base + a new plywood base.

I understand what you guys are trying to say, but the wood is in good shape minus the 3" bottom. It held the tank just fine about a week ago as is, so anything I do can only improve it. It would cost me a lot more money and time to build a new one which in turn would also not match the canopy. So again as I stated above, It's my judgement call.
 

Jefft

Members
You trivialize the "black mold" issue. Aspergillious black mold is toxic and it will kill you. I was exposed to it in the air vents of the air conditioner of a house I lived in several years back and I still suffer the effects. Please be careful.
 

davidhusker

Members
You trivialize the "black mold" issue. Aspergillious black mold is toxic and it will kill you. I was exposed to it in the air vents of the air conditioner of a house I lived in several years back and I still suffer the effects. Please be careful.

Thank you. I did a good amount of reading before I took on the task. I wore proper masks and made sure the garage was wide open with a fan. I know over time mold can cause terrible health effects. But my job was one to two hours. I made sure I took the correct steps to kill it (actually I did double duty on it) and now I am using the premium killz mildew/water resistant paint. It's the best I can do as we all know this will always be susceptible to water and humid areas.
 

davidhusker

Members
I do appreciate the concern but I want to at least say that the inside looks worse than it really is. MOST of it is just topical, if that's a word I can use in this case. The wood is very strong, except the portions I am rebuilding. I did consider Using cinder blocks, and using the existing stand as a "cover". But cinder blocks just dont have the right measurements.

Anyhow, Here is the beginning of the reinforced bottom frame.

IMAG0363.jpg


IMAG0364.jpg


I have not cleaned the top of the stand, the black you see is loose dirt, mold. It should clean right off. The whole exterior will be cleaned with degreaser and painted in premium low lustre black paint.

I got pretty far tonight, I have all the bracing and reinforcing DONE, but I want to put in a bunch of screws before I paint.

I appreciate all the support and criticism both. This could very well FAIL on me. I hope not, and I know you all hope it does not. But I am confident in the wood and the way I am putting it back together in a wallet friendly yet sturdy way.

--
My to do layout basically..
Finish letting liquid nail dry
Screws
Paint Interior
Add exterior Molding around bottom which will hide the bad, plus the top already has molding so it will look more symmetric.
Clean and Paint exterior of stand, canopy, doors
PROBABLY paint back of aquarium (I am debating, dont want to ruin it)
Move Stand and Tank to Permanent location
Buy and apply bulkheads (PLUGS)
Create sump filters. RIght now they are basic acrylic boxes about 35 gallons each. I will be adding media, bio balls, etc, but mainly a basic piece to separate media from pump...
Plumb the tank (Tank did come with a nice Mag 9.5!)
Purchase lighting (The AWESOME coralife ones that it came with have bad bulbs & Ballasts and I will wait on repairing those.)
Fill & Test filtration for leaks.. make sure level, etc.
PRAY!
Transfer 180 show tank items, sand, fish, water, etc over to new tank.


... then I will move the 180 to the fish room and put the fronts in there...
So I will track all that here. Wish me luck.
 

Tony

Alligator Snapping Turtle/Past Pres
Looking good, Dave. Keep up the good work and certainly keep the thread updated. Your Frontosa will be lookin' good in an 8-footer!
 

davidhusker

Members
I wanted to get the bottom on and connected with liquid nails before I started using screws or nails. It's just easier if you're working alone, someone does have to hold the wood while I screw in the other side. Anyhow here is more progress.

I sanded down the bottom edges before placing on the bottom plywood. Now the stand is glued down (liq nail) to the plywood base, all around.

IMAG0366.jpg


Here is the beginning of framing the bottom of the stand. I sort of messed up, but it works out. I should have put the new vertical support pieces on first, then surrounded those by the bottom base pieces. However I ended up having enough to double enforce the vertical wood support.

IMAG0367.jpg


IMAG0365.jpg
 

AquaStudent

Members
This will be quite a build! I hope your reinforcements work on that stand. That'll be a lot of weight on it. I built a stand with my dad for a tank build we have in the works. We used 4x4's as the main supports and two 2x4s in the center. It's strong enough to hold an elephant yet alone the 110 or so gallons we intend to put on it.

It's surprising how strong wood is but don't risk too much. If you have any hesitations at all about that stand then you're better off waiting until you're confident. 250 gallons is quite a lot.

The tank is going to be gorgeous once you get it up and running.

Best of luck to you and keep this thread updated.
 

04rwon

Members
This is badass. I think youll have a lot of satisfaction since you did it yourself. DIY projects are always the most rewarding.
 

davidhusker

Members
Small Update. I noted previously I had all the support braces up but never put photos up. I was out of town all weekend so I am now sealing and painting the interior of the stand. Once complete I can move on to cleaning and painting the exterior. Then we should be ready to move it down to the basement.

Base support
IMAG0368.jpg


Vertical support
IMAG0369.jpg
 
Top