AquaStudent
CCA Members
Here's the progression of building my DIY foam and concrete background. It was a fun project for sure!
The plan is to get at least one 8'x4' sheet of insulating foam from my local hardware store and cut that down to size to make a rock background. Cut out "rock pieces" from the remaining part of the sheet to bring the background into the 3rd Dimension. I'd cover the background in concrete and then silicone it to the back wall (and perhaps use some buried rocks to keep it against the glass and not floating.
NOTE: the background (and aquascape) will need to be in at least three pieces because my tank has a center brace.
The tricky part will really be the aquascape. I want to build up a realistic looking scape, ideally reminiscent of Lake Malawi but upon more thought that may be tricky to do. The aquascape must accomplish a few goals
1) Cover up/hide the aquarium equipment including the filter intake/outflow, heaters, and powerheads
2) Provide ample hiding places and cover for fish of all sizes and have open spaces for swimming
3) Not restrict the light to the tank (the light is mounted 5+" above the tank so this may not be much of an issue)
4) Look awesome (because it's going to be a permanent aquascape)
The aquascape will be built off and blend with the backround. I plan on using the foam sheets from the local hardware store and foam inserts that come in some packaging. Those should be able to give me random pieces that can be cut down and form rocks.
An interesting thought I had was caves and hiding places can be built and supported with PVC (white) or Electrical conduit (dark gray) tubing. That may provide a safe and easier way to provide caves and hiding places.
Does anybody have any experience with building a background/aquascape and have any suggestions on how to build this. I head back to school most likely on the 20th of January and want to have it soaking in a tub outside a couple of days before then to finish off the pH spike.
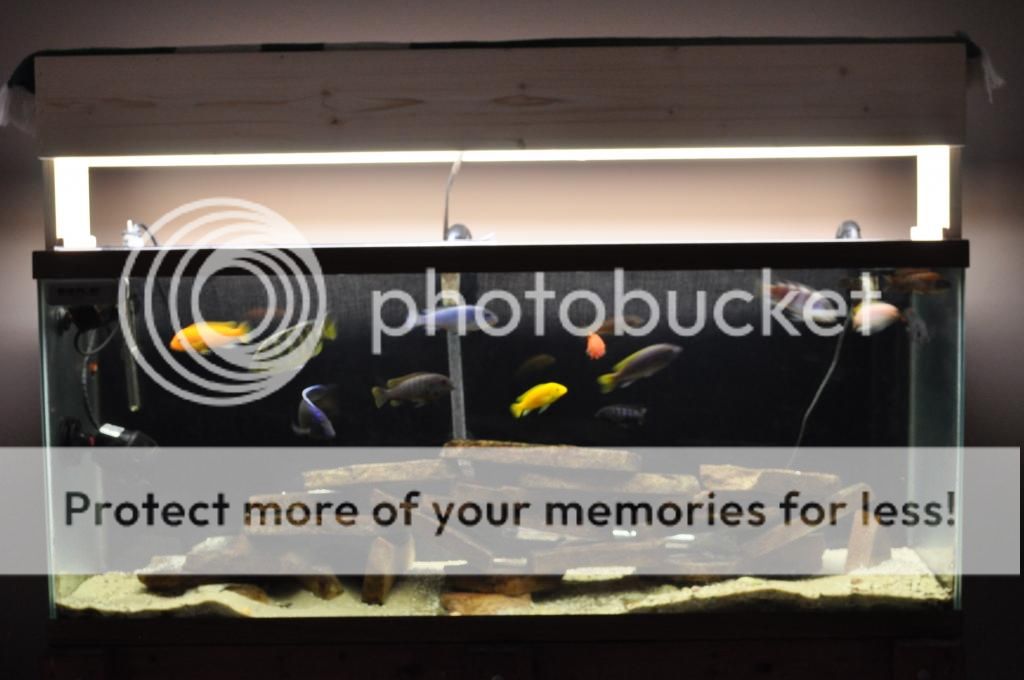
Thanks. Here's a shot of the tank for your reference.
EDIT: Here's How I'm making my Background
Supplies Used:
2'x8' Sheet of Insulating Foam - Pink
Random Packaging Styrofoam (Used for Rocks and Scaping)
Gorilla Glue
GE Silicone I
Concrete
Concrete Color
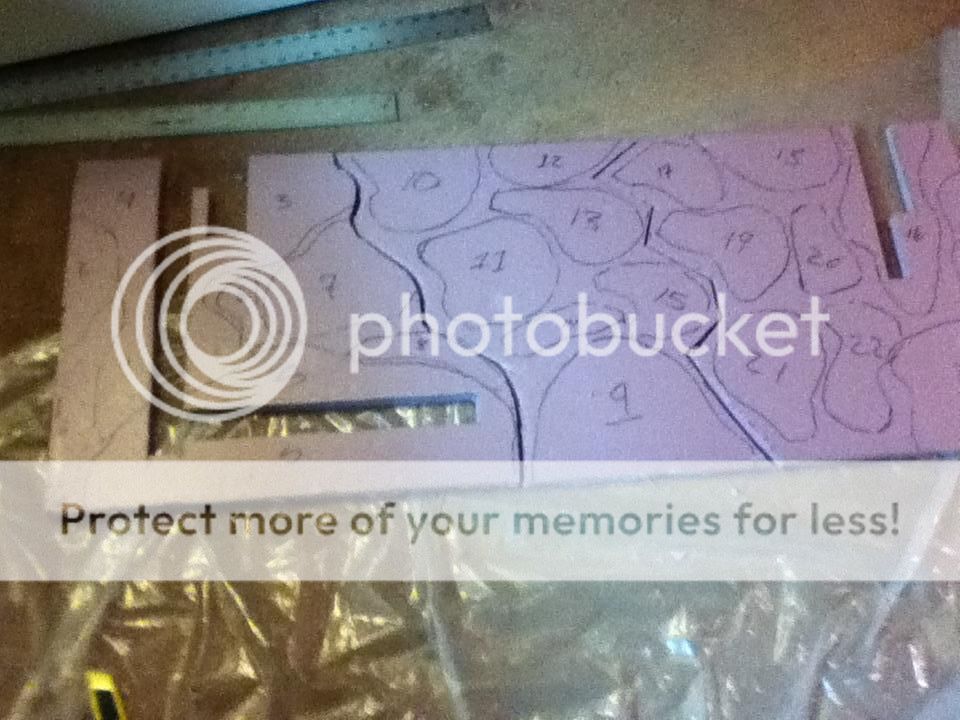
I figured out where each piece of equipment will be. I then decided how I wanted the water to flow through the tank and made sure the equipment (heaters, powerheads, filter parts) were in locations that would allow for their proper performance.
Cut the 2'x8' foam to fit the tank. Two sheets the dimensions of the tank will be required, one as a "spine" and a second for decorating rocks.
Mark out where the equipment will be and how you want the decorating background rocks to be and their shape.
I had to cut my background into three sections in order to fit it into the tank. My tank is a standard 55 gallon setup which has the center brace. Keep this in mind when planning your background.
Cut out the rocks and locations for the equipment. Shape the rocks by trimming the edges with a knife and sanding to blend. Glue into place. I marked each rock with a number to keep the spot.
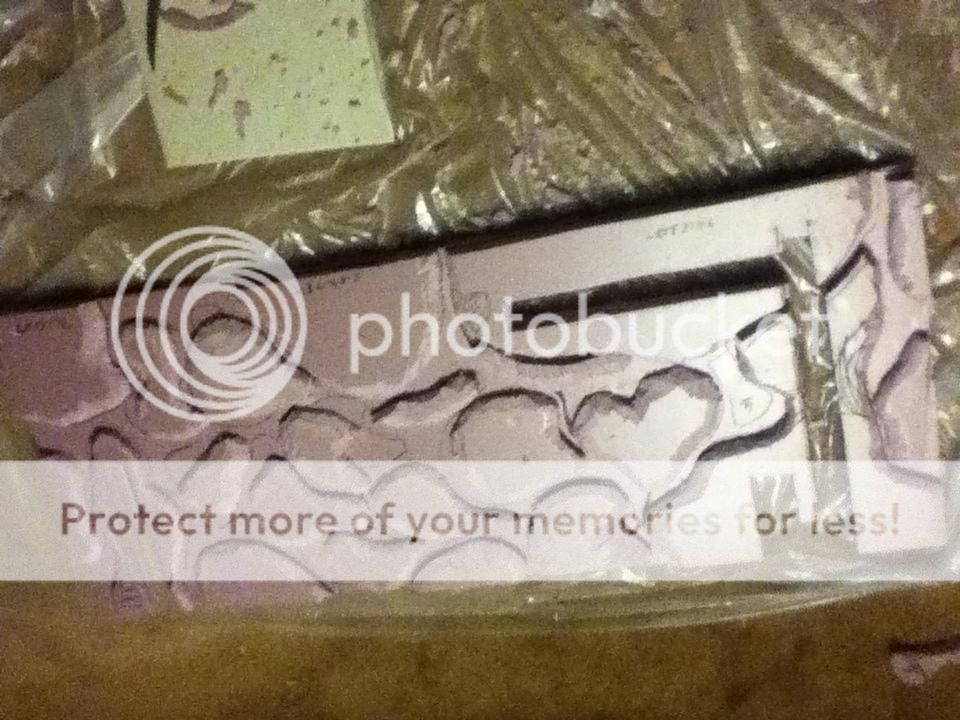

Weighing down the rocks while the glue dries makes for a stronger bond. I let this go overnight.
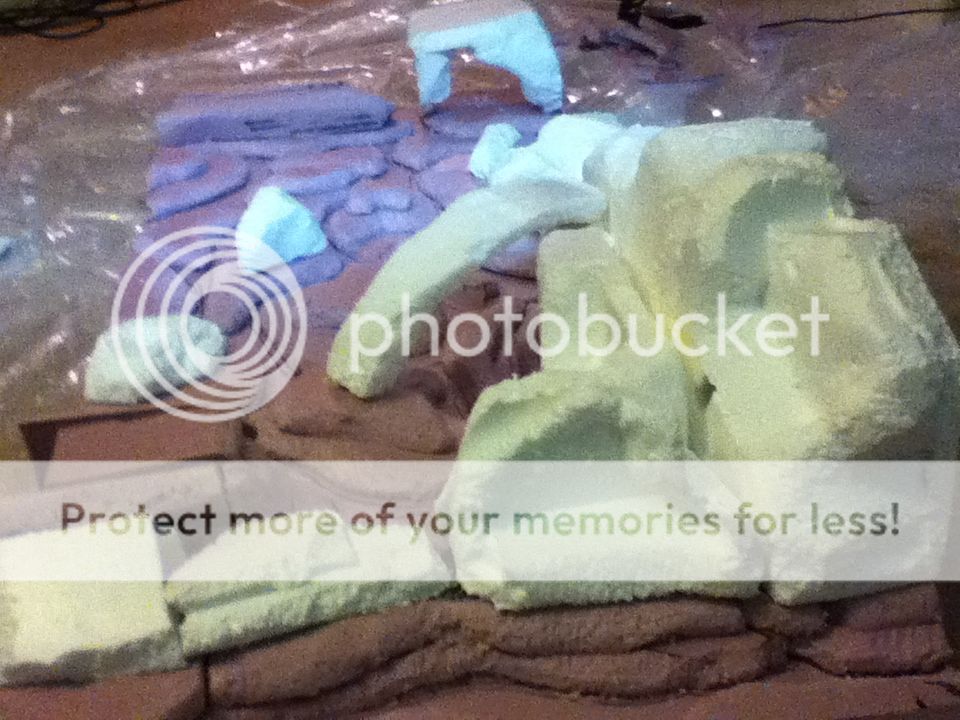
Continue to cut out rocks and build the chambers for your equipment. Blend the edges with a knife and sandpaper. Expandable spray foam will be used later on to fill in gaps and help a bit more with blending.
Now we're getting somewhere!
This is after the glue dried
Archway Sidewayish view
Foam!
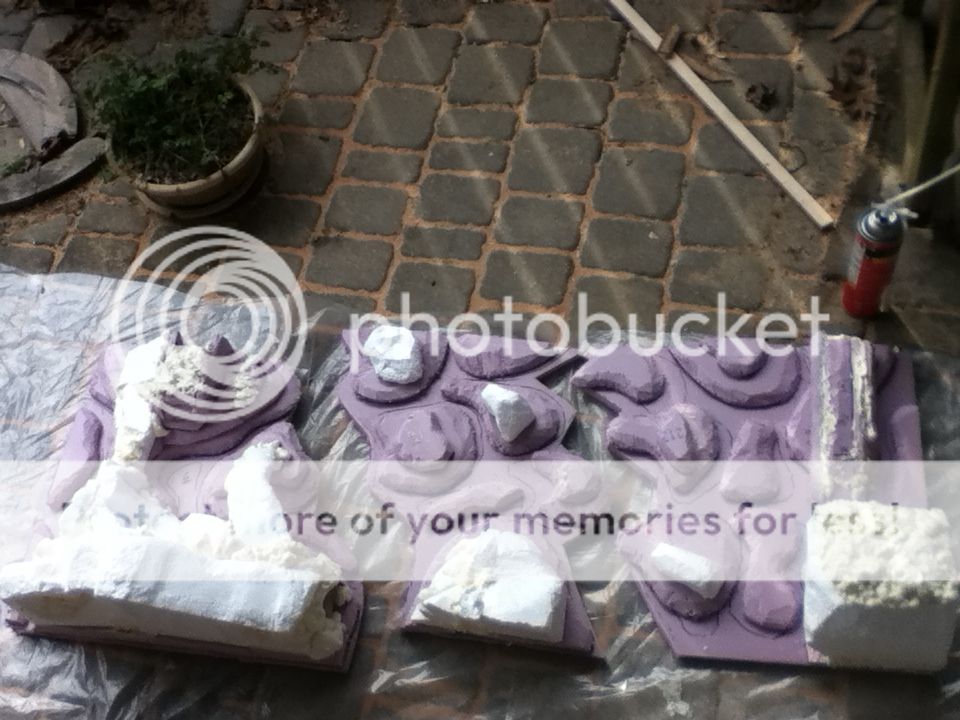
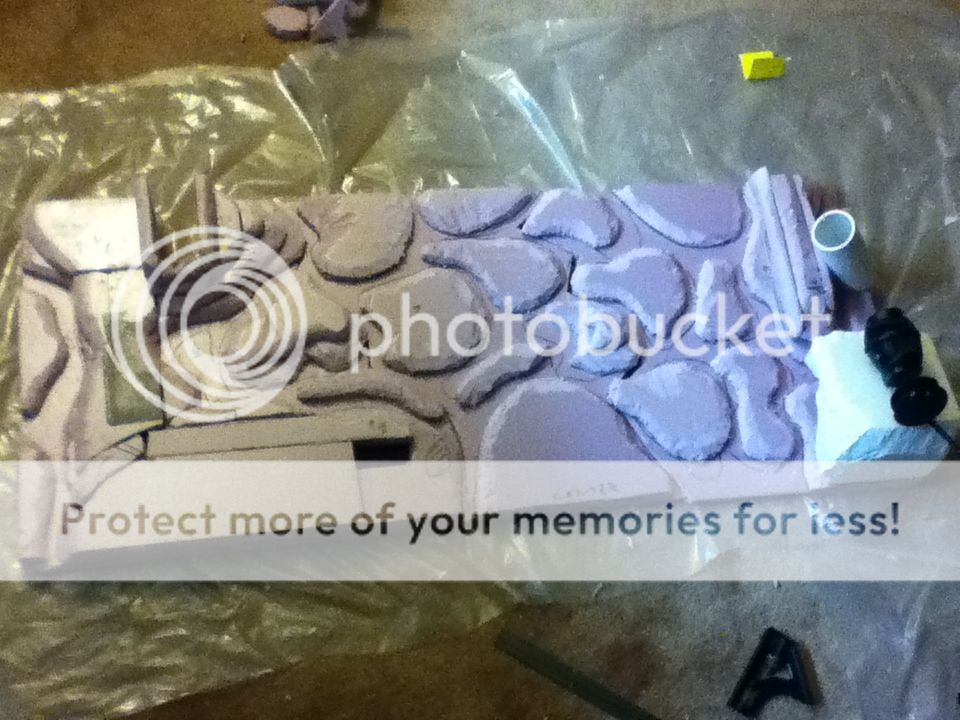
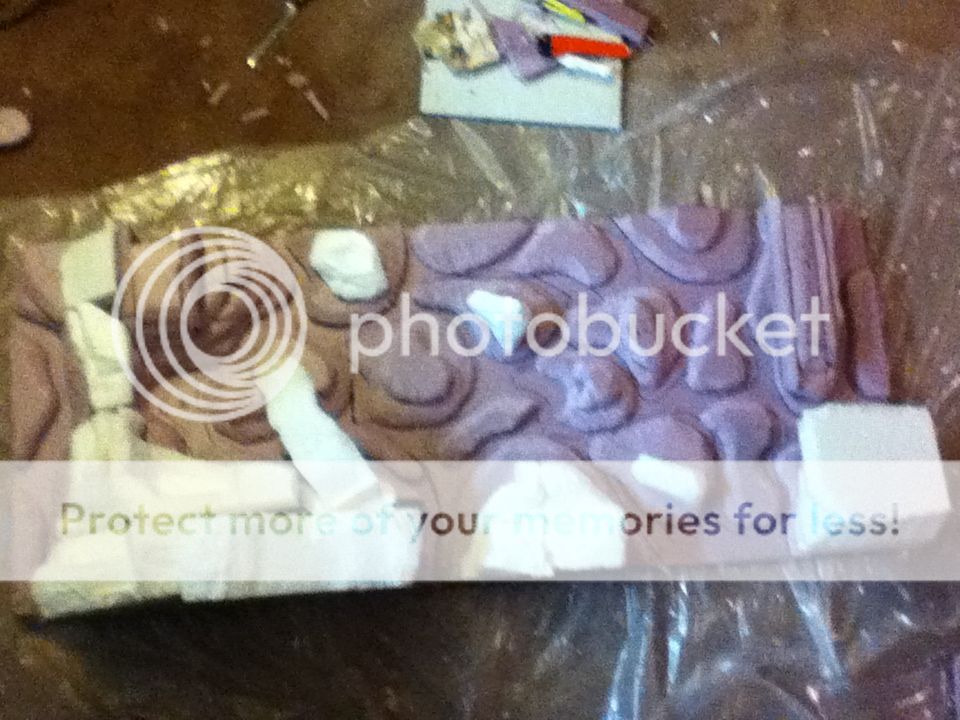
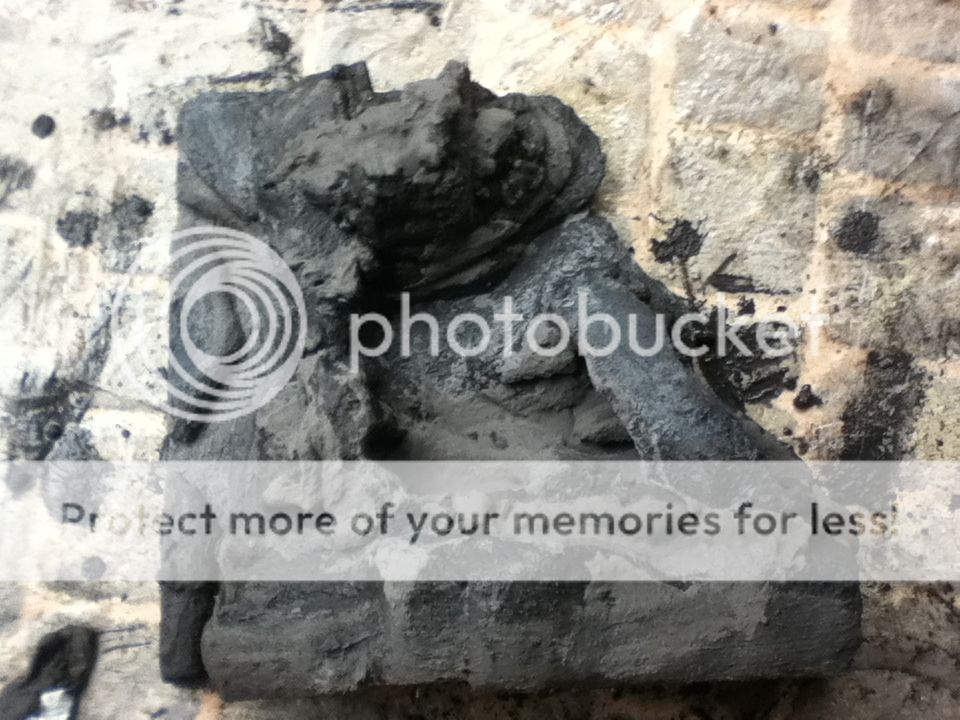
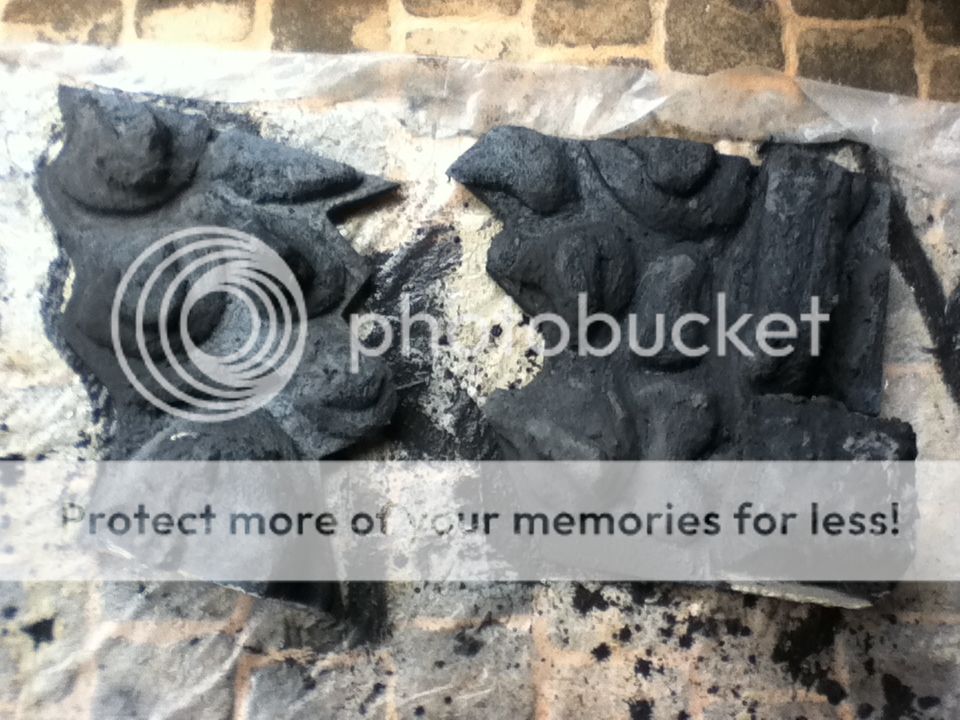
Here's the pieces after two layers of concrete. I took these photos before I added the third and hopefully final layer of concrete (added to put in more texture).
Left Piece:
Center and Right Pieces:
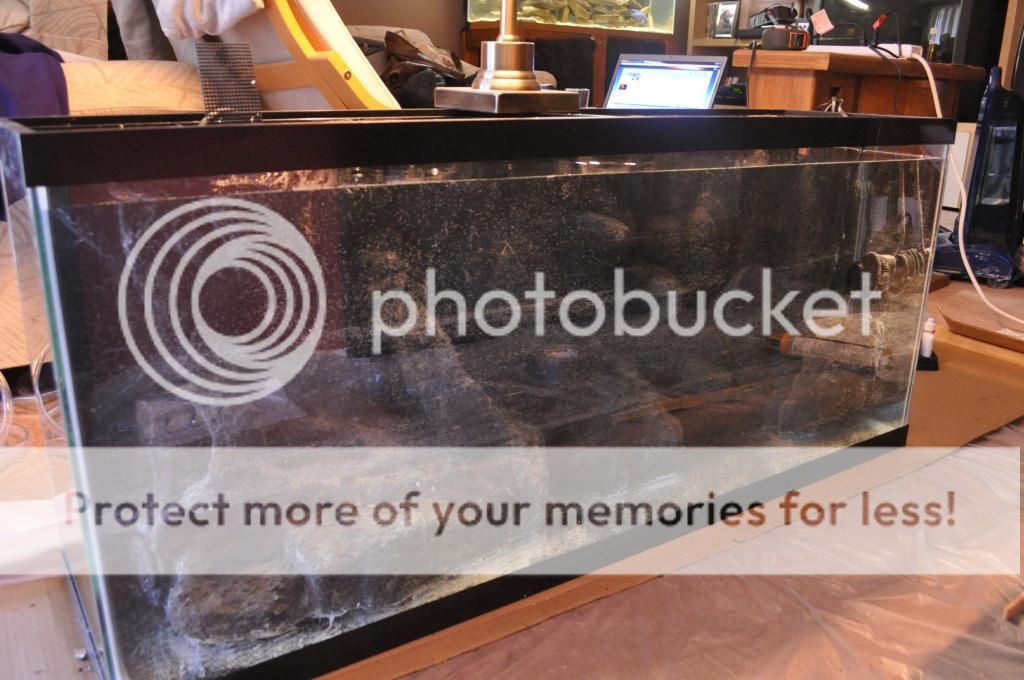
I now have the pieces siliconed into the tank and them soaking. It took quite a bit of planning, cutting, and retrying to get the pieces to fit in the tank. I also had to do some modifications to the heater port on the backside but that's all fixed now (and the heater is even in place!)
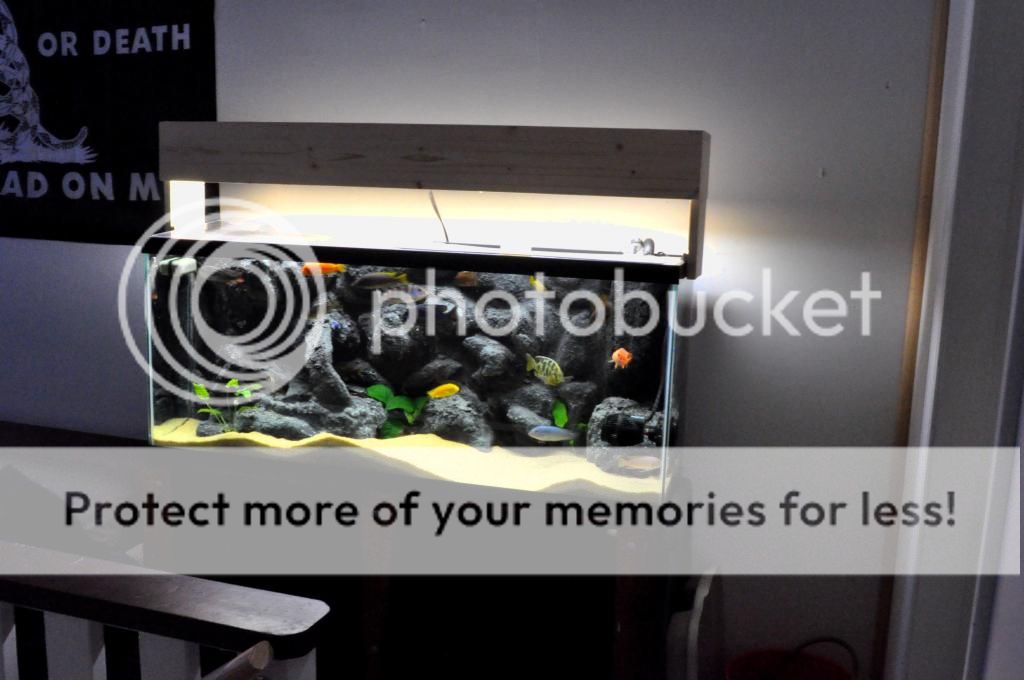
I apologize in advance for the major reflections in the picture. The tank is in a tight spot right now (and I don't want to move it by myself if I don't have to) and the lighting is poor. But it gives you an idea of what it looks like.
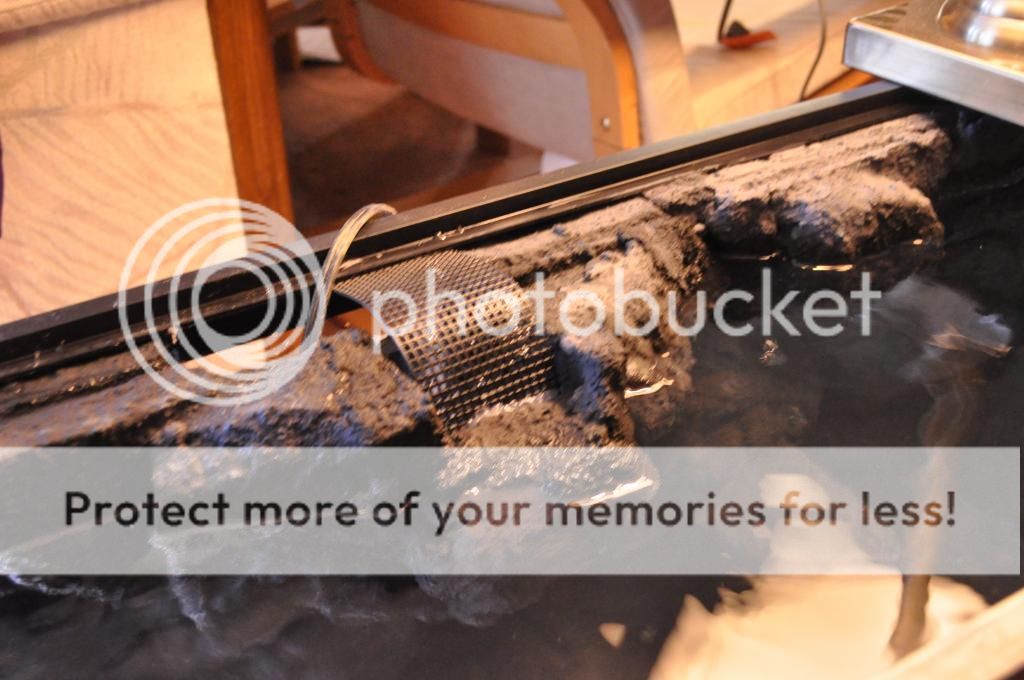
I also took a piece of leftover black canvas from when I made a moss wall and used it to create a dynamic cover for the surface adgitation power head. That way water can get out but fish can't get in The plastic canvas is siliconed to the inside of the chamber and pinned under the tank frame. I can slide the canvas back to unpin it from the frame and get access to the powerhead and filter intake chamber
pH Tracker
Control: 8.0
1 Iteration: 8.2
3 Iterations: 8.8+
Here's a shot of the pH test tubes. The far left is the third (maybe 4th actually) waterchange. I left it soaking for a few hours with the Hydor 1050 powerhead on for water circulation. It may have gone off the charts of the High Range Test Kit. The center is the first waterchange after soaking for a bit. The far right is the control of fresh water. The colors are a bit darker in person. The camera (with the flash) makes it seem much more translucent.
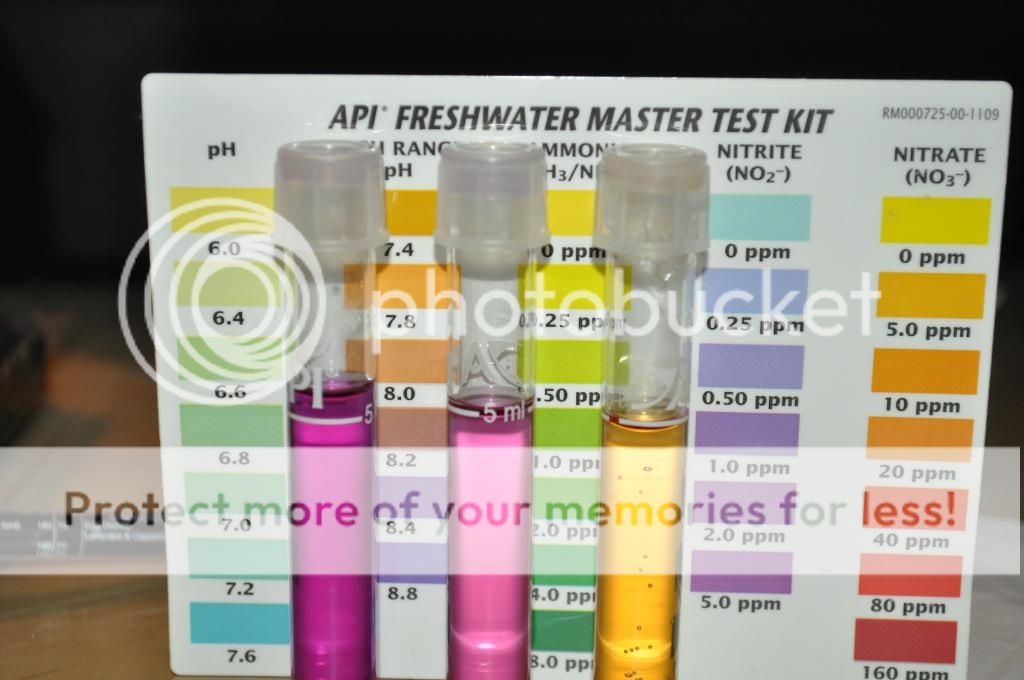
After another complete water change and a good hour + soak I tested params again. It looks like they are at about 8.2. That's good (since pH is measured on a logarithmic scale). The leeching may be dieing down. I'm goign to wait a little bit longer then empty out the tank, fill it up again, and then head to bed and test the params again in the morning.
To fix the leeching problem I covered the concrete using an acrylic concrete sealer. There are two ways to use the sealer, as a cover and as a mixer. You could mix the sealer into the concrete and then add to the foam which may prevent leeching in the first place. Since I was sealing after I just covered the outside of the concrete. You are supposed to use an airgun to spray on the sealer but I didn't have one and wouldn't have been able to maneuver it in the tank anyway. I used a brush and it was thicker than I wanted in some places (understandably) and effected the color. Use an air gun to spray the pieces before adding to the tank or mix the sealant into the concrete originally.
After sealing the leeching was not an issue
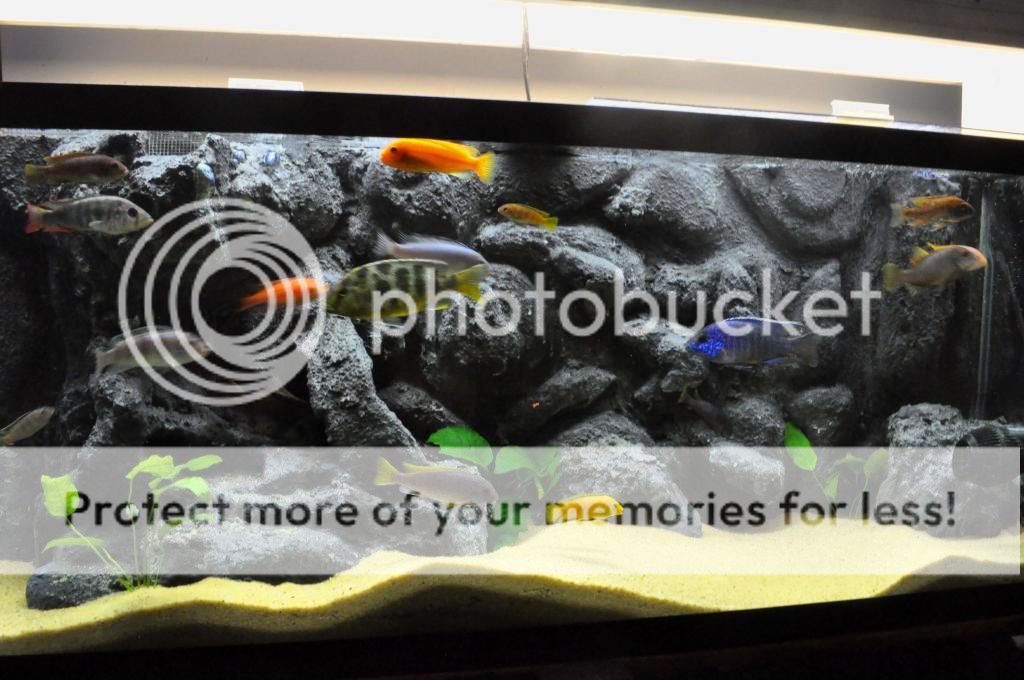
Here's the "finished" result. Because I didn't have time to let the foam sit as long as I wanted to there was some shrinking. A few locations had pieces of cement chip off but I will be able to fix that this summer (hopefully).
January 2, 2013
February 2, 2013
NEW VIDEO SHOWING THE AQUASCAPE AND FEATURES!
http://www.youtube.com/watch?v=UJLZfkXLvus
The plan is to get at least one 8'x4' sheet of insulating foam from my local hardware store and cut that down to size to make a rock background. Cut out "rock pieces" from the remaining part of the sheet to bring the background into the 3rd Dimension. I'd cover the background in concrete and then silicone it to the back wall (and perhaps use some buried rocks to keep it against the glass and not floating.
NOTE: the background (and aquascape) will need to be in at least three pieces because my tank has a center brace.
The tricky part will really be the aquascape. I want to build up a realistic looking scape, ideally reminiscent of Lake Malawi but upon more thought that may be tricky to do. The aquascape must accomplish a few goals
1) Cover up/hide the aquarium equipment including the filter intake/outflow, heaters, and powerheads
2) Provide ample hiding places and cover for fish of all sizes and have open spaces for swimming
3) Not restrict the light to the tank (the light is mounted 5+" above the tank so this may not be much of an issue)
4) Look awesome (because it's going to be a permanent aquascape)
The aquascape will be built off and blend with the backround. I plan on using the foam sheets from the local hardware store and foam inserts that come in some packaging. Those should be able to give me random pieces that can be cut down and form rocks.
An interesting thought I had was caves and hiding places can be built and supported with PVC (white) or Electrical conduit (dark gray) tubing. That may provide a safe and easier way to provide caves and hiding places.
Does anybody have any experience with building a background/aquascape and have any suggestions on how to build this. I head back to school most likely on the 20th of January and want to have it soaking in a tub outside a couple of days before then to finish off the pH spike.
Thanks. Here's a shot of the tank for your reference.
EDIT: Here's How I'm making my Background
Supplies Used:
2'x8' Sheet of Insulating Foam - Pink
Random Packaging Styrofoam (Used for Rocks and Scaping)
Gorilla Glue
GE Silicone I
Concrete
Concrete Color
I figured out where each piece of equipment will be. I then decided how I wanted the water to flow through the tank and made sure the equipment (heaters, powerheads, filter parts) were in locations that would allow for their proper performance.
Cut the 2'x8' foam to fit the tank. Two sheets the dimensions of the tank will be required, one as a "spine" and a second for decorating rocks.
Mark out where the equipment will be and how you want the decorating background rocks to be and their shape.
I had to cut my background into three sections in order to fit it into the tank. My tank is a standard 55 gallon setup which has the center brace. Keep this in mind when planning your background.
Cut out the rocks and locations for the equipment. Shape the rocks by trimming the edges with a knife and sanding to blend. Glue into place. I marked each rock with a number to keep the spot.
Weighing down the rocks while the glue dries makes for a stronger bond. I let this go overnight.
Continue to cut out rocks and build the chambers for your equipment. Blend the edges with a knife and sandpaper. Expandable spray foam will be used later on to fill in gaps and help a bit more with blending.
Now we're getting somewhere!
This is after the glue dried
Archway Sidewayish view
Foam!
Here's the pieces after two layers of concrete. I took these photos before I added the third and hopefully final layer of concrete (added to put in more texture).
Left Piece:
Center and Right Pieces:
I now have the pieces siliconed into the tank and them soaking. It took quite a bit of planning, cutting, and retrying to get the pieces to fit in the tank. I also had to do some modifications to the heater port on the backside but that's all fixed now (and the heater is even in place!)
I apologize in advance for the major reflections in the picture. The tank is in a tight spot right now (and I don't want to move it by myself if I don't have to) and the lighting is poor. But it gives you an idea of what it looks like.
I also took a piece of leftover black canvas from when I made a moss wall and used it to create a dynamic cover for the surface adgitation power head. That way water can get out but fish can't get in
The plastic canvas is siliconed to the inside of the chamber and pinned under the tank frame. I can slide the canvas back to unpin it from the frame and get access to the powerhead and filter intake chamber
pH Tracker
Control: 8.0
1 Iteration: 8.2
3 Iterations: 8.8+
Here's a shot of the pH test tubes. The far left is the third (maybe 4th actually) waterchange. I left it soaking for a few hours with the Hydor 1050 powerhead on for water circulation. It may have gone off the charts of the High Range Test Kit. The center is the first waterchange after soaking for a bit. The far right is the control of fresh water. The colors are a bit darker in person. The camera (with the flash) makes it seem much more translucent.
After another complete water change and a good hour + soak I tested params again. It looks like they are at about 8.2. That's good (since pH is measured on a logarithmic scale). The leeching may be dieing down. I'm goign to wait a little bit longer then empty out the tank, fill it up again, and then head to bed and test the params again in the morning.
To fix the leeching problem I covered the concrete using an acrylic concrete sealer. There are two ways to use the sealer, as a cover and as a mixer. You could mix the sealer into the concrete and then add to the foam which may prevent leeching in the first place. Since I was sealing after I just covered the outside of the concrete. You are supposed to use an airgun to spray on the sealer but I didn't have one and wouldn't have been able to maneuver it in the tank anyway. I used a brush and it was thicker than I wanted in some places (understandably) and effected the color. Use an air gun to spray the pieces before adding to the tank or mix the sealant into the concrete originally.
After sealing the leeching was not an issue
Here's the "finished" result. Because I didn't have time to let the foam sit as long as I wanted to there was some shrinking. A few locations had pieces of cement chip off but I will be able to fix that this summer (hopefully).
January 2, 2013
February 2, 2013
NEW VIDEO SHOWING THE AQUASCAPE AND FEATURES!
http://www.youtube.com/watch?v=UJLZfkXLvus
Last edited: