• You liked BFD7 now you should join this forum and of course become a club member to see what CCA is all about.
  • Thank you to everyone who registered and showed up for the BIG Fish Deal #7.

Fish room planning

I was lucky enough to plan the basement fishroom from the ground up. The fishroom is 4" lower than the rest of the basement slab. This is to help contain the water in an unlikely event of a catastrophic failure (knock on wood). The floor drain will take care of the spill via a sump pump. I also make sure there are no wood studs touching the fishroom floor, so two of the walls are metal studs.

IMG_1077.jpg


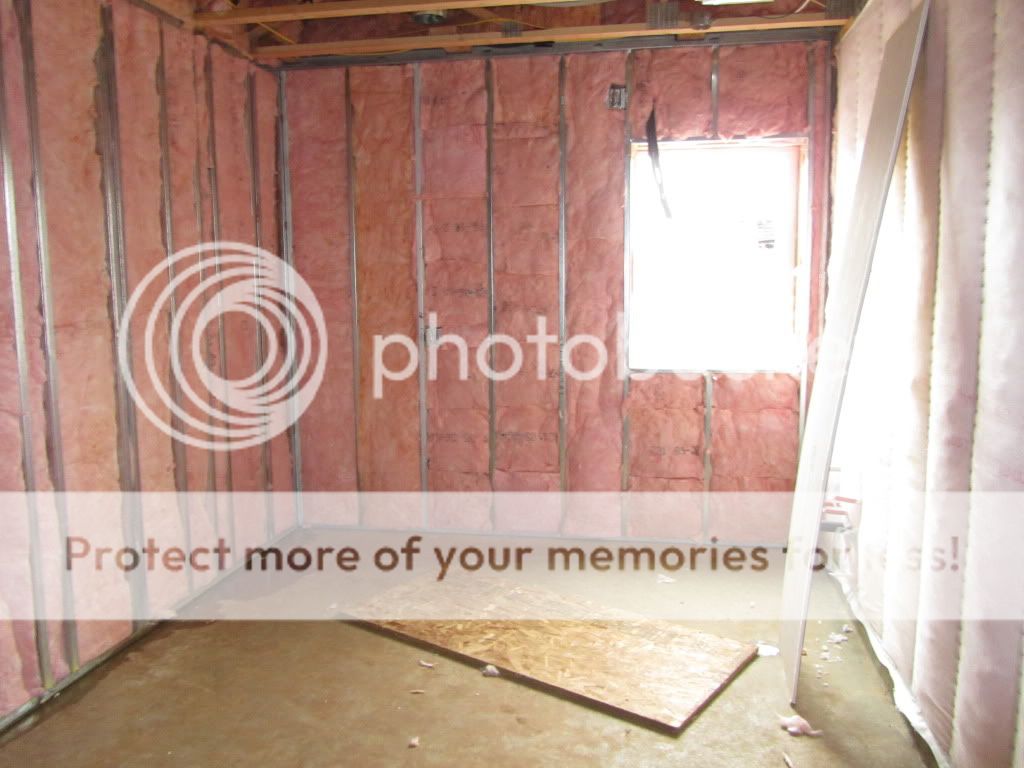
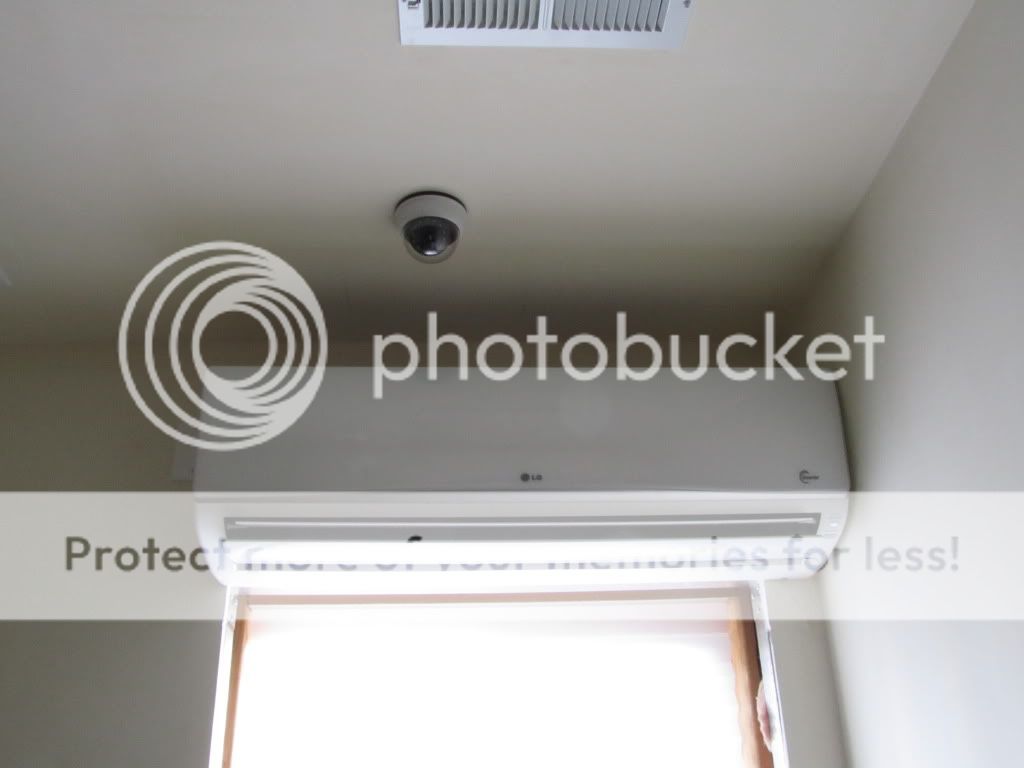
Since I heat the entire fishroom using a minisplit, all the walls and ceiling are insulated. Even the doors are all exterior type to help insulate the room better.

FishroomDoor.jpg


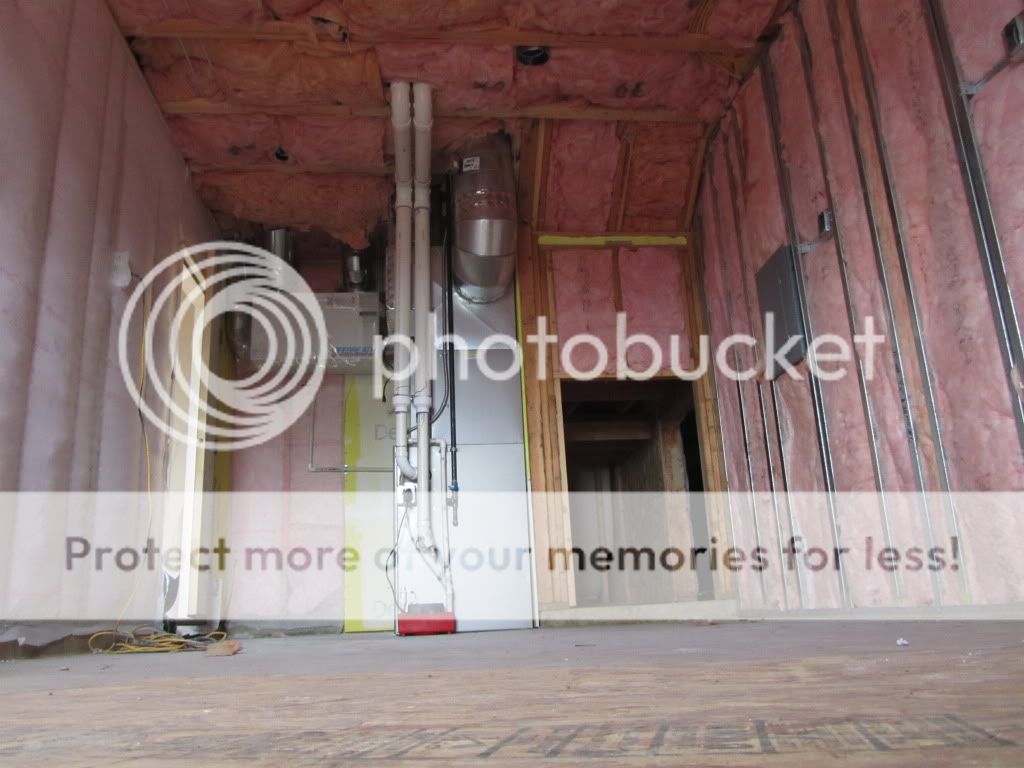
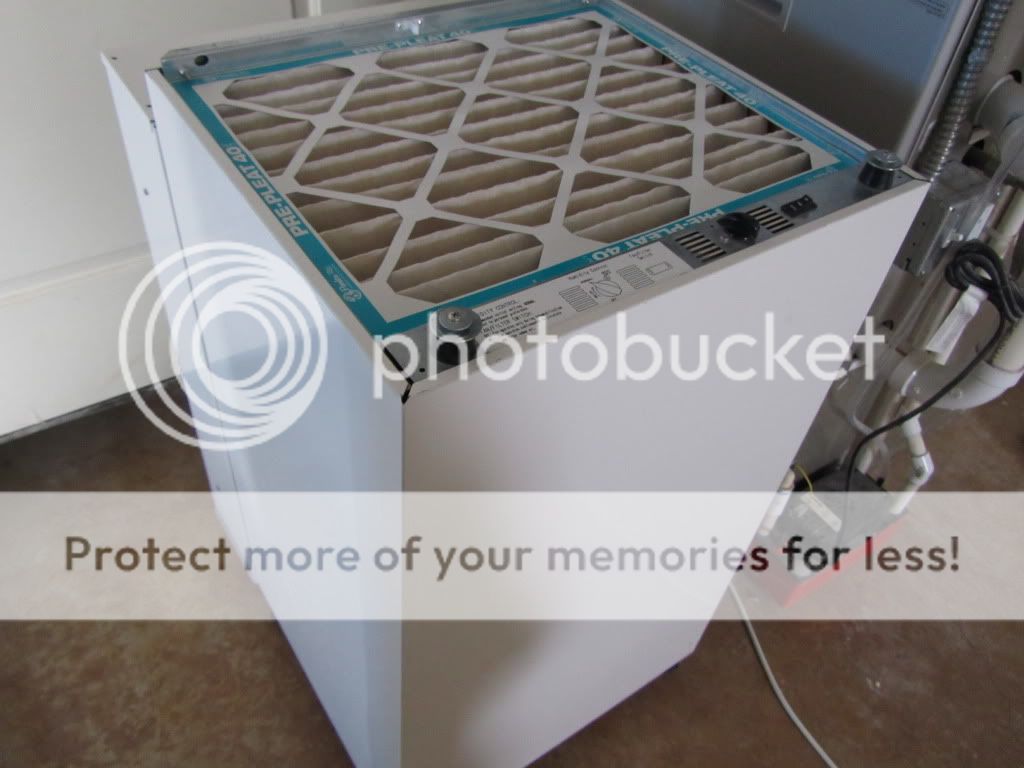
There are both passive and active humidity control to make sure the RH does not get over 50%. The passive control is done via a HRV venting the room air to the outside. The active control are done by a Santa Fe Rx dehumidifier as well as the minisplit (build-in dehumidifier function).

IMG_1141.jpg


SantaFe_Rx.jpg


LG_LSU181HSV_minisplit.jpg

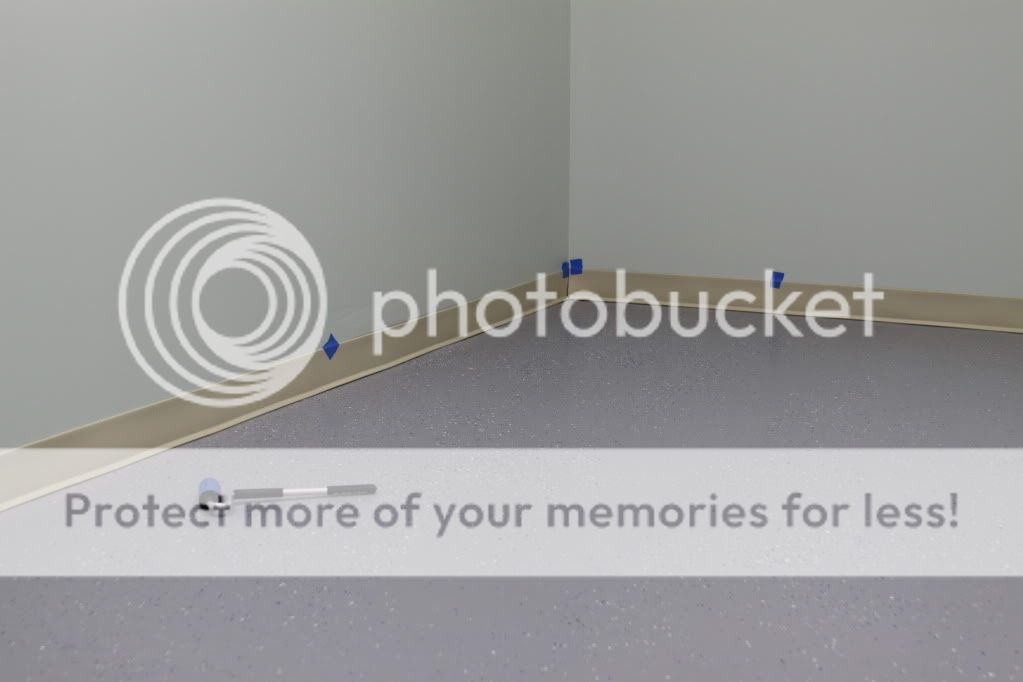
To minimize moisture penetration into the walls and ceiling, I opted for the 5/8" yellow board (DenseShield) instead of the standard drywall or the green board. In addition, the fishroom is slightly negative pressure to further retard moisture penetration behind the walls. To make sure I have enough electrical outlets, I added a 100A subpanel and outlets position at chest height and on the ceilings. Last but not least, I resurfaced the floor for both a cleaner look and ease to maintenance.

IMG_3231.jpg


IMG_3283.jpg
 

Buckcich

Members
Very impressive and one of the better equipped fishroom I have seen! Alot attention for detail.
Do you have pictures of the finished room?
What do you plan in term of tank sizes? And what are you planning on stocking with it?
 
The room is finished. I am currently working on setting up all the stands, only got 3 setup but not fully plumb. I need to build a wood stand to help safe space which is my next project.

As for fish, I will be keeping balloon ram (working on balloon version of EBR), bulldog discus, Blood Parrot cichlid, and the top secret bubble-eye double-tail lion-head balloon glo-cacatuoides.
 

Sonny Disposition

Active Member
Sounds like a good plan. I'd be inclined to go with two high. I have to stand on a stool to get to some of my higher tanks, and it's cumbersome. If I had to do it over again, I'd also raise the lower tanks a little. Sometimes it's hard to see what's going on in them, and in my experience, if you lose sight of what's happening in a tank, that's when things go wrong.

I'd also go with 2X4s. I think it's a good idea to overbuild (just in case.) No one ever expected that earthquake back in August. Plus, sometimes people fall and stumble into things.

So I have gotten permission to use 1/2 of our rec room as a fish room.

I plan to build my fish room around 30 breeder tanks(and maybe some 40s).

At this point I am trying to decide to do the rack(s) 2 or 3 high. Also trying to decide between 2x4(or probably 2x3) and commercial shelving. Any recommendations from those who have fish rooms?

I don't think getting a drain in the room will be possible, but I do have a patio where I can empty out waste water. I probably am going to use Matt Quinns overflow design for most of the tanks.
 

Pat Kelly

CCA Member
Staff member
Sounds like a good plan. I'd be inclined to go with two high. I have to stand on a stool to get to some of my higher tanks, and it's cumbersome. If I had to do it over again, I'd also raise the lower tanks a little. Sometimes it's hard to see what's going on in them, and in my experience, if you lose sight of what's happening in a tank, that's when things go wrong.

I'd also go with 2X4s. I think it's a good idea to overbuild (just in case.) No one ever expected that earthquake back in August. Plus, sometimes people fall and stumble into things.

Over build. LOL thats what I did years ago.
I put 2x6 horizontal and doubled 2x4 verticle. I also bolted one end of the stand to the floor joists above. I lag bolted everything. Now remember that I did this when there were no clubs around and no internet. LOL I just guessed. I have had people tell me that they are built wrong but they have been standing for 20 years . lol
 

verbal

CCA Members
I have nearly completed the first stand.

I am glad that I started small. Some things went well and some can be improved on.

I think I prefer the 2x3 over 2x4s. I think this should make the longer stands still light enough to move pretty easily.

The biggest issue is for some reason I decided to put the full length pieces on the outside rather than the inside. I think it will end up more bulk that necessary because of needing to add extra pieces to make it rigid. I found a design on MFK I plan to adapt to hold a total of 6 tanks.


attachment.php


I will use 8 foot 2x3s for the rails and add supports in the middle. The openings will be 41" wide which is a big of wiggle room and also gives the ability to convert to 4-10 gallon tanks if necessary. The top would have the ability to support 2 x 75s, but the height would be too much.
 

Tony

Alligator Snapping Turtle/Past Pres
^^^^ Seriously stout design right there.

@Albert - How often is the Mini Split on? Do you run it year-round to reduce humidity or only when it's hot out to cool the room?
 

verbal

CCA Members
progress and changes

Well I will likely have to adjust my planning. In a good way because I have another tank(180 gallons to accomodate).

I finished the construction of my "test stand". I am planning to do a light stain to match the tank stands.

180 gallon tank (800x599).jpg

180 gallon tank 2 (800x757).jpg

stand1 (689x800).jpg

stand2 (759x800).jpg
 
I also think the stand is abit overkill. Also, I dont like all that wood resting on the floor as they will get wet easy and hard to dry. I just finished phase-3 of my fishroom which consist of two wood stands (to save space) that would hold 12 20-gallon tanks.

As to the answer on the minispit, it is set on 'heat mode' during the winter. In the summer, it will be set to 'cool mode'. It does has an 'AI mode' that will heat or cool as needed but I find it coming on way too often as it will over heat the room slightly and then over cool. The temperature would oscillate around the setpoint abit more. Part of the issue of the AI mode is due to the unit being rated for over 1000 sq ft and being used in a 200+ sq ft fishroom. Unfortunately, I need a 18KBTU unit to make sure the room will cool fast enough during the summer.
 

verbal

CCA Members
I also think the stand is abit overkill. Also, I dont like all that wood resting on the floor as they will get wet easy and hard to dry. I just finished phase-3 of my fishroom which consist of two wood stands (to save space) that would hold 12 20-gallon tanks.
I agree the stand is overbuilt. I think I am going to go with a much less bulky design for the longer rack. Probably something based on Ted Judy's design.
 

verbal

CCA Members
The plans have been adjusted yet again. I am going to go with 30 breeders on double stands. Shane(of Planet Catfish fame) posted plans for a double 40 breeder stand build from Edsal shelving on the PVAS message board. I adjusted his approach to get 2 stands out of one shelving set.

Here is a pic with the bottom tank built in:

attachment.php


I plan to add black fabric with magnets between the tanks. I may also cover the holes on the front side of the tank.

double breeder stand (800x599).jpg
 

jonclark96

Past CCA President
Where did you pick up the stands? I need to get a double high for a 40 breeder set up and this would definitely fit the bill.
 

verbal

CCA Members
Home depot.

http://www.homedepot.com/Edsal/h_d1...splay?langId=-1&storeId=10051&catalogId=10053

Here is the post on the PVAS site.

http://www.pvas.com/forum/viewtopic.php?f=5&t=3052

The only tricky part is you have to build around the bottom tank.

I did the bottom piece on the long sides first and then put the tank lying on its front side on top of the long side. Then I put the other long end on and attached the short sides on the bottom. Once they were loosely attached I slid the tank up and pounded them into place. Then I closed up the top.

It was pretty quick for the first one and even faster once I knew what I was doing :)

Using the 6th notch up I have 10" of clearance with a 30 breeder tank. I think you would get a similar clearance with a 40 breeder on the second notch up.
 

jonclark96

Past CCA President
Thanks for the links. Did you cut the legs (the HD page looks like they are 6' +/- tall) or do they come in shorted heights?
 

verbal

CCA Members
The legs are in 3' sections. To assemble as pictured on the HD site, you would connect them.

I just put them together separately. So I will get 2 stands for a total of 4 tanks out of one set.
 

dogofwar

CCA Members
I've seen those kinds of stands before and was a little iffy about putting so much weight on the metal connecter things. Kinda like having all of the weight on the bolts of a 2x4 stand.

Of course, I'm also iffy about the particle-board stands holding up 90% of the fish tanks in America ;)

Matt
 

londonloco

Members
Looks like the exact unit I used for my 20g long rack. It's been over 2 years now, and the set up looks as good as new. You won't be disappointed in your decision.
 
Top