P
Paul
Guest
Hello, all. ")
I thought I'd share pictures of my DIY styrofoam/concrete background that I made for my 55 gallon Tang tank.
If anyone else has gone through this laborious project, feel free to share pictures, descriptions of how you made them, etc.
Mine took several months of off-again on-again work, but I'm fairly pleased with the result.
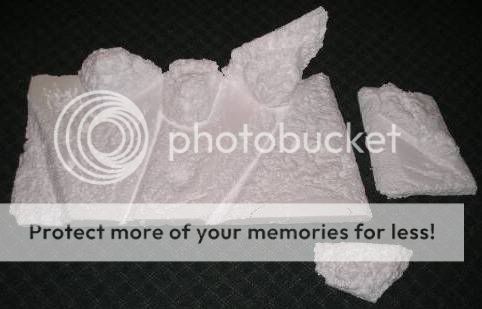
First I started by carving the styrofoam (an EXTREMELY messy job), which I purchased at Lowe's (a huge 8' x 4' x 2" sheet!). I created one large section which I later had to break up because I forgot about the brace in the middle of the top of the tank. To create overhangs, I just siliconed smaller chunks to the "wall". After using the silicone (GE I Clear Window & Door), I had to let it cure before moving on to the concrete phase of the project. Normally this stuff only takes a day or two to completely cure, but mine took almost 2 weeks. You want to wait until you can't smell any more acetic acid coming off the silicone. Here’s a picture:
After the pieces were all carved out, I mixed up some basic mortar mix (the really fine stuff – no pebbles, etc.). I mixed it with water so that it was not too thick, but not too runny either. I coated the pieces with a paintbrush and let everything dry for 2 or 3 days. Every 3 or 4 days, I painted another coat until the styrofoam had 5 coats of concrete. Then I siliconed everything into the tank and it took about a week for the silicone to completely cure. I really slathered the silicone on thick, coating the concrete pieces and then sticking them to the glass.
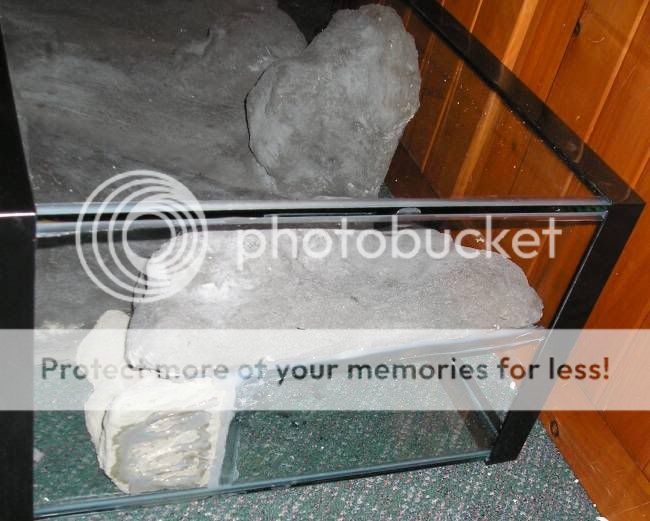
So the final structure consists of the main “wall†(with overhanging “rocksâ€) along 4/5 of the length of the tank. On the right hand side, I created a chamber by placing one of the concrete pieces diagonally from the back of the tank to right wall of the tank. Under this chamber, I placed another concrete piece with a hole. Over the hole, I siliconed a piece of mesh paint strainer sheet to keep the fish from swimming up into the chamber. The chamber houses the canister filter uptake, an Aquaball power-head/internal filter, and a digital thermometer probe.
On the left hand side of the background, there is a cut-out that houses the canister filter return spray bar, which sprays water out over one of the overhangs.
Once everything was in place, and the silicone was completely cured, I applied one more coat of cement, this time tinted with black concrete color pigment to darken it up a little. I also painted the floor of the tank with cement to give it a “natural†look when the shellies dig down to the tank floor.
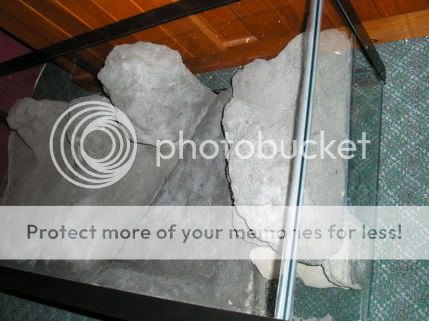
Here are some pictures of the tank before the last coat of cement was added:
The final step was to cure the concrete. To do this I filled the tank with water and about 30 lbs of water softener salt, which circulated using the power head for about 3 days. I took a pH reading, and it was up around 11.0! After 3 days, I did a 100% water change, this time with no salt. I let that circulate for another 3 days, and changed the water again. Then I used the rest of my water softener salt and let that go for another 3 days. After about eight million more water changes, the pH finally stabilized around 8.8.
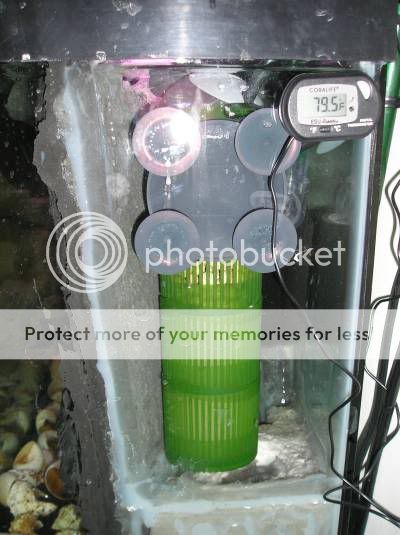
Here’s a picture of the right hand side view of the tank, showing the chamber:
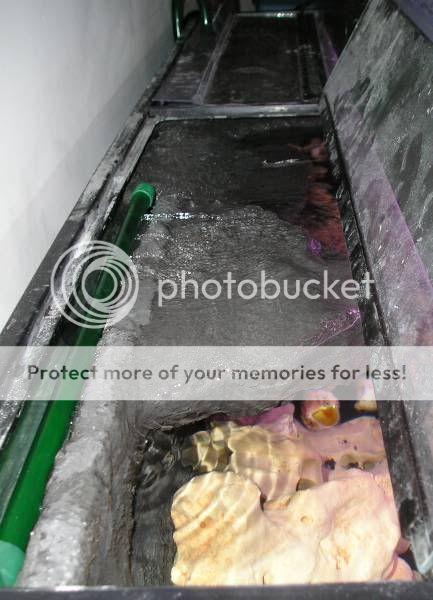
Here’s a picture of the return spray bar on the left hand side of the tank:
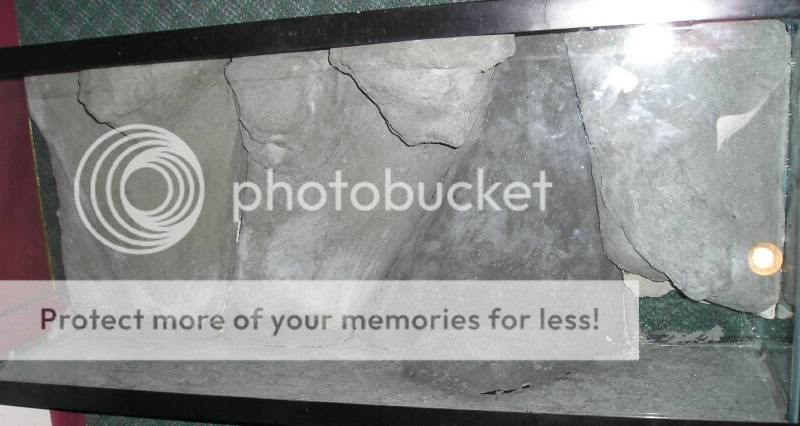
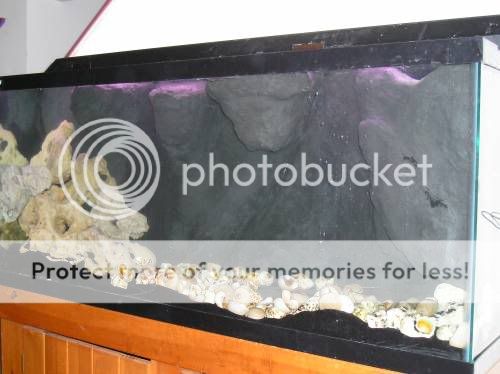
And here’s the final result – a tank with no visible internal equipment:
This was my first shot at a DIY background, and I’ll probably do it again for my next tank!
Right now the tank is cycling with 6 Giant Danios, but eventually the tank will house some julies, multies and synodontis petricola.
Please ignore the poor photography – I’m still learning.
I thought I'd share pictures of my DIY styrofoam/concrete background that I made for my 55 gallon Tang tank.
If anyone else has gone through this laborious project, feel free to share pictures, descriptions of how you made them, etc.
Mine took several months of off-again on-again work, but I'm fairly pleased with the result.
First I started by carving the styrofoam (an EXTREMELY messy job), which I purchased at Lowe's (a huge 8' x 4' x 2" sheet!). I created one large section which I later had to break up because I forgot about the brace in the middle of the top of the tank. To create overhangs, I just siliconed smaller chunks to the "wall". After using the silicone (GE I Clear Window & Door), I had to let it cure before moving on to the concrete phase of the project. Normally this stuff only takes a day or two to completely cure, but mine took almost 2 weeks. You want to wait until you can't smell any more acetic acid coming off the silicone. Here’s a picture:
After the pieces were all carved out, I mixed up some basic mortar mix (the really fine stuff – no pebbles, etc.). I mixed it with water so that it was not too thick, but not too runny either. I coated the pieces with a paintbrush and let everything dry for 2 or 3 days. Every 3 or 4 days, I painted another coat until the styrofoam had 5 coats of concrete. Then I siliconed everything into the tank and it took about a week for the silicone to completely cure. I really slathered the silicone on thick, coating the concrete pieces and then sticking them to the glass.
So the final structure consists of the main “wall†(with overhanging “rocksâ€) along 4/5 of the length of the tank. On the right hand side, I created a chamber by placing one of the concrete pieces diagonally from the back of the tank to right wall of the tank. Under this chamber, I placed another concrete piece with a hole. Over the hole, I siliconed a piece of mesh paint strainer sheet to keep the fish from swimming up into the chamber. The chamber houses the canister filter uptake, an Aquaball power-head/internal filter, and a digital thermometer probe.
On the left hand side of the background, there is a cut-out that houses the canister filter return spray bar, which sprays water out over one of the overhangs.
Once everything was in place, and the silicone was completely cured, I applied one more coat of cement, this time tinted with black concrete color pigment to darken it up a little. I also painted the floor of the tank with cement to give it a “natural†look when the shellies dig down to the tank floor.
Here are some pictures of the tank before the last coat of cement was added:
The final step was to cure the concrete. To do this I filled the tank with water and about 30 lbs of water softener salt, which circulated using the power head for about 3 days. I took a pH reading, and it was up around 11.0! After 3 days, I did a 100% water change, this time with no salt. I let that circulate for another 3 days, and changed the water again. Then I used the rest of my water softener salt and let that go for another 3 days. After about eight million more water changes, the pH finally stabilized around 8.8.
Here’s a picture of the right hand side view of the tank, showing the chamber:
Here’s a picture of the return spray bar on the left hand side of the tank:
And here’s the final result – a tank with no visible internal equipment:
This was my first shot at a DIY background, and I’ll probably do it again for my next tank!
Right now the tank is cycling with 6 Giant Danios, but eventually the tank will house some julies, multies and synodontis petricola.
Please ignore the poor photography – I’m still learning.