• You liked BFD7 now you should join this forum and of course become a club member to see what CCA is all about.
  • Thank you to everyone who registered and showed up for the BIG Fish Deal #7.

My DIY Sump and Wet Dry Filter (reprinted from The Biotope)

Charlutz

Members
My Do-it-Yourself Sump and Wet-Dry Filter
by Charlie Campisi

If you want something done right, you have to do it yourself.
- Dads everywhere
Why DIY?

Most of us started in this hobby with a single ten gallon tank. The first day we got that tank set up, we couldn't take our eyes off of our new swordtails or neons. The second day? We dreamed of getting a big tank -- like maybe even a 20 gallon! We dreamed of bigger and bigger tanks but there was always a catch the stand wasn't the right color, there weren't enough light fixtures or feeding doors in the canopy, or it was too expensive.

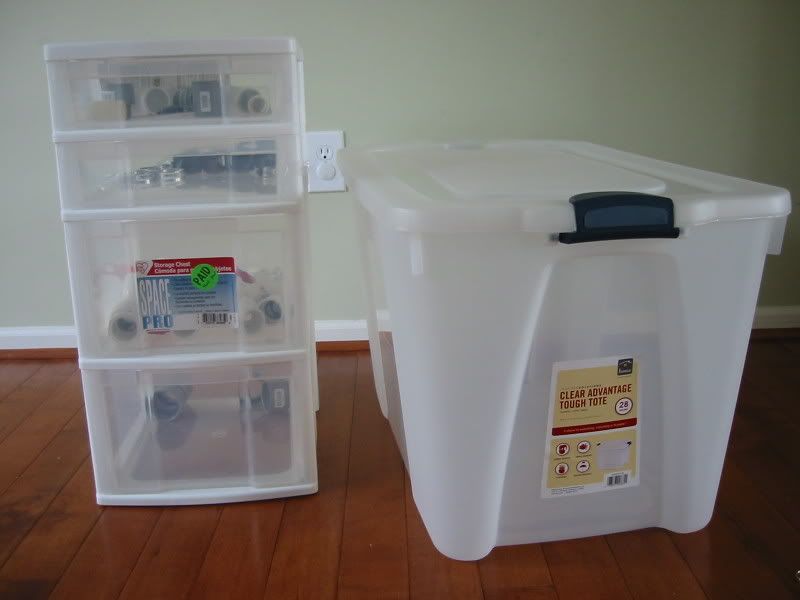
My first 4 foot tank was a used reef tank that came with a cabinet stand, sump system and canopy. Sounds great, right? I was thrilled to bring it home, but then I decided that I didn't want a black stand and the canopy wood was rotten. At least the sump worked, but even it had some design issues. I was frustrated with my new purchase. I have some common sense but very little in the way of building skills. A friend who was a general contractor said it would be easy to fix and I tagged along at his side as he helped me fix that first set up. Along the way, I learned the basics of stand design, electrical wiring, and staining and wood finishing. That first project opened the DIY world for me. It may not have been perfect, but I was able to build features into my stand and canopy that I could not find commercially. I did it my way.

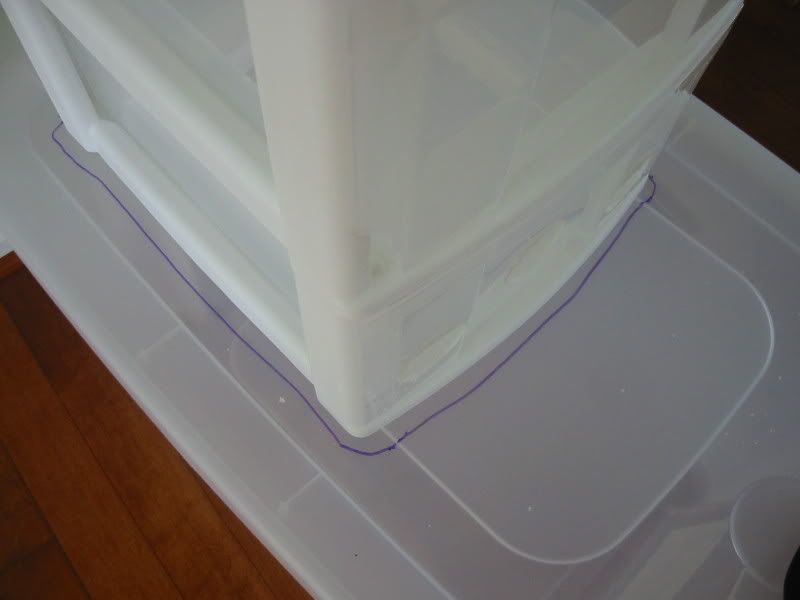
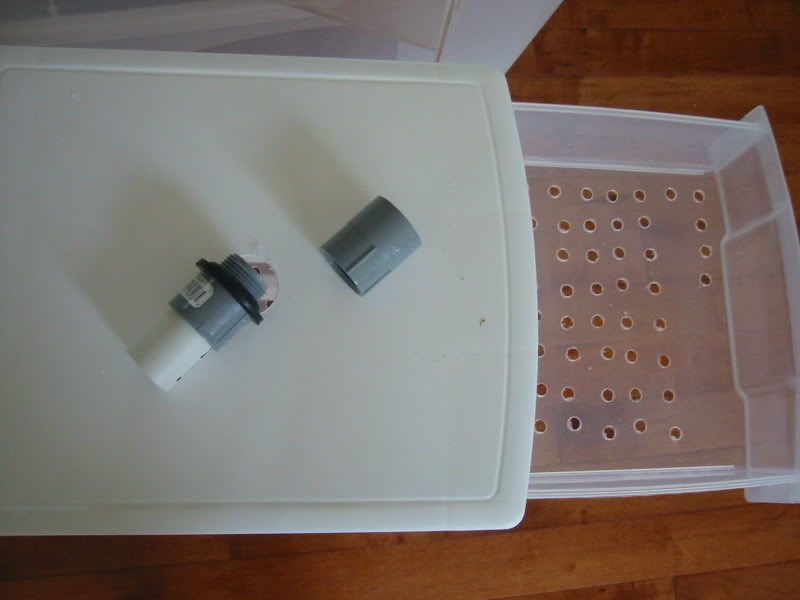
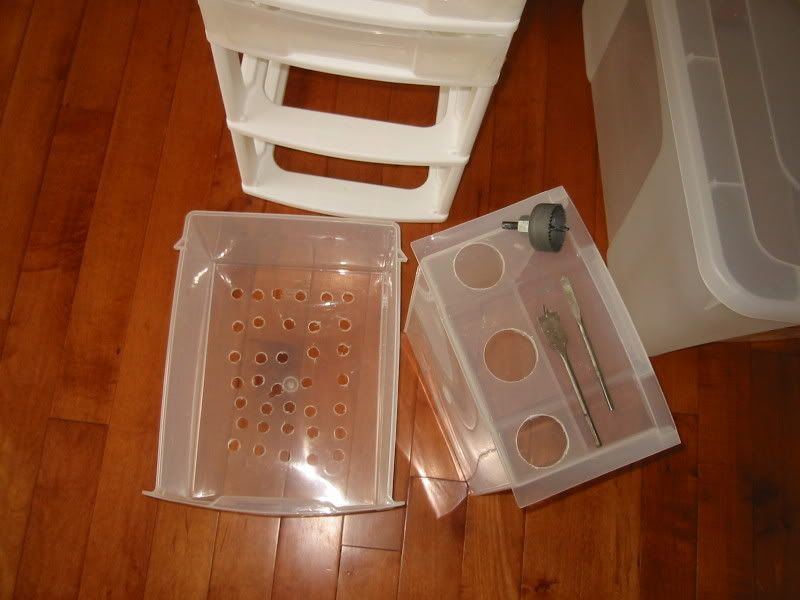
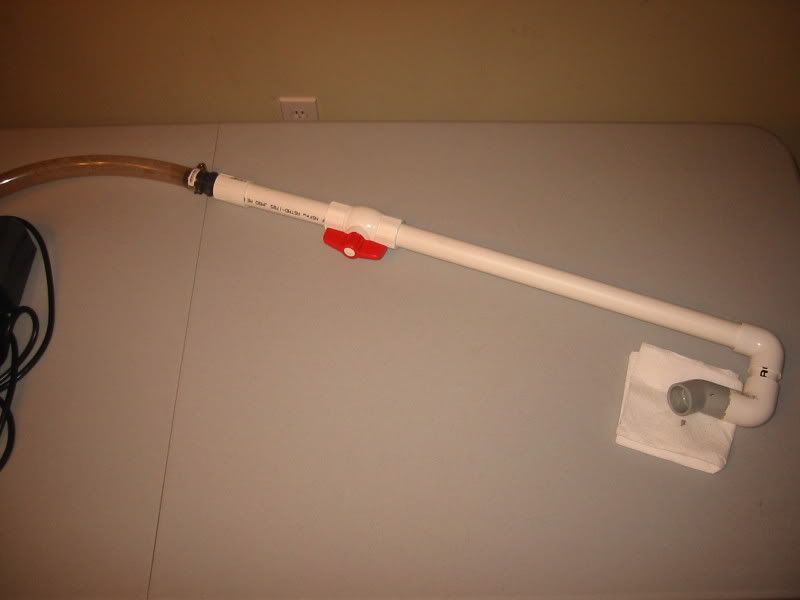
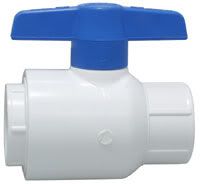
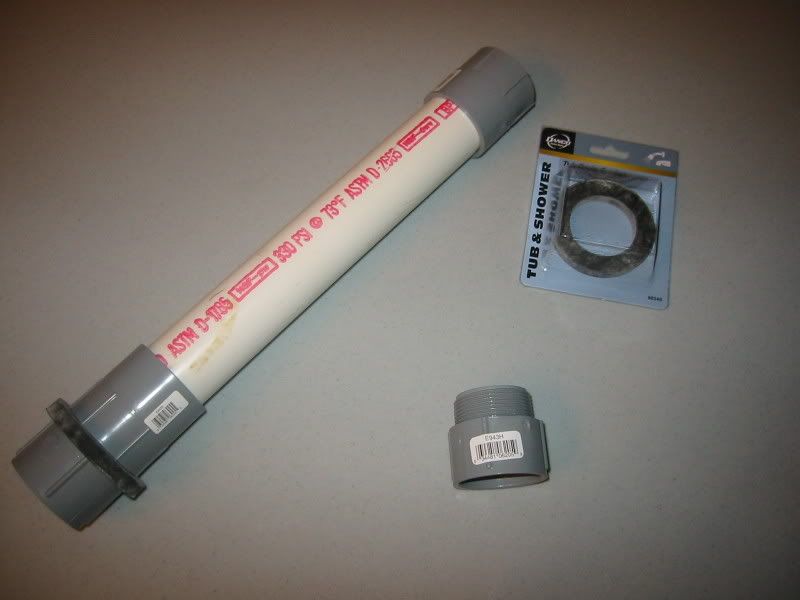
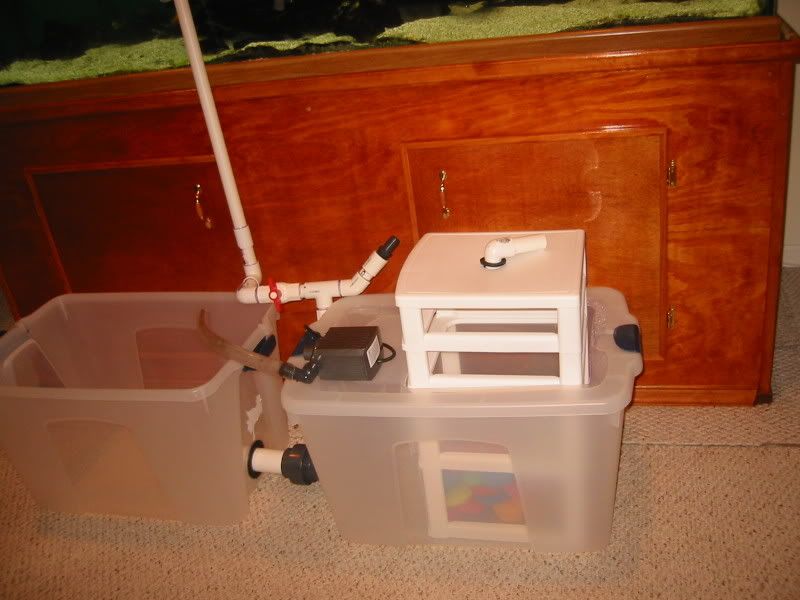
We are living in the golden age of DIYers. DIY skills and designs are mostly passed along through word of mouth and in the internet age, the information flows freely. Search engines and forums dedicated to our hobby give us tremendous access to information. Do a Google search for DIY aquarium ________ and you'll be amazed at what you can find in 0.4 seconds. That first ill-designed sump of mine lasted ten plus years and parts of it were up until very recently filtering my main 210 gallon tank. I decided to scrap that filter and build one that better suited my needs, so started researching the project and came up with the filter described below. One disclaimer I do not claim ownership of any single idea that makes up this filter. It is an amalgam of ideas found for free on the internet or by copying ideas from other peoples' systems. Free information is the best thing about DIY projects. My way of repaying those who helped me (sometimes unknowingly) is that I pass on the information whenever I can, while at the same time asking for ideas to improve what I've done. Hopefully, you will do the same if you have the chance.
 

Charlutz

Members
The Sump

A sump is merely a container for holding water that is separate from the main display tank and connected through a drain and return system. The drain can be drilled and plumbed into the display tank, or it can be a hang-on siphon driven device. Drains and siphons are collectively referred to as “overflows” because they transport water to the sump as it overflows from the display tank. There are DIY overflow solutions, but I've always used commercial overflows because the overflow is visible inside the tank and I want it to look a certain way. Maybe someday I'll give it a shot, but good commercial overflows are available in the $30-60 range and to me it's worth the expense for the professional look inside the tank.

The sump itself should be large enough to house all your equipment, including a filter tower, heaters, return pump and any other accessories you might use like an ultraviolet light, fluidized bed filter or in the case of saltwater, a protein skimmer. The sump should also be large enough to compensate for evaporation. Evaporation is of particular concern in a sump system because the overflow ensures that your water level in your display tank remains constant. For instance, if your 200 gallon tank loses ten gallons per week to evaporation, the water level in the display tank will remain constant, while the sump level will drop the full ten gallons. If your sump holds only 12 gallons, you run the risk of running your pump dry. A good rule of thumb for most tanks is a sump size of at least 20% of the size of the display tank. At that size, you should not have to add water in between weekly or even semi-monthly water changes. Other things to consider are how much water will flow through the sump and how much water will “back-siphon” into the sump when the power shuts off. I'll discuss these aspects in greater detail below.

I chose a storage container from Target for my sump ($13). It holds 28 gallons and I have a 210 gallon tank, so I'll need to use two. I chose a semi-clear container because I like to easily check the water level, but opaque containers work also, as do old tanks, or most anything that will hold water. One downside of Rubbermaid type storage containers is that they are not meant to hold water and the weight of the water will likely cause them to bow. As you can see, I chose one with locking handles. Locking the top in place adds structural integrity to the sump preventing it from bowing, as well as providing a good seal to minimize evaporation. In addition to getting a sump big enough to cover evaporation, the other concern is finding one that will fit under your tank. Measure carefully and leave yourself a margin for error. Target and other stores have a large variety to choose from, so keep looking until you find what you need.


IMG_4498.jpg


Charlutz

Members
The Filter Tower

Wet-dry or trickle filters work on the principle of circulating the tank water over media with a large surface area where it is exposed to air and water, comprising a very effective environment for the bacteria that convert fish waste into nitrite and nitrate. Since our sump will be about half full of water, we need a “tower” to hold the media above the water level. Ideally, the tower will have several levels in which we can store different types of media. I chose a four drawer storage unit because I wanted several types of media (see above pic). The one weakness of sumps is that they usually don't have the best mechanical filtration. An extra drawer to contain fine filter media alleviates that weakness.

Something very important to keep in mind when shopping for a storage unit is its height. The unit must be able to fit under your stand with approximately 6-8” of clearance. This is because we are going to attach plumbing to the top of the storage unit, but more importantly, the overflow drain must run downhill to the filter tower. If the tower is too tall, the drain tubing will make a U, and water flowing down and then uphill to reach the tower can cause problems like excess noise or flooding. I bought my storage unit at Jo-Ann's Fabrics. The price was $28, but Jo-Ann's always has coupons floating around for 40-50% off, so it only cost $17. I don't understand why, but my wife found it very funny to watch me clip coupons and head out to Jo-Ann's. Jo-Ann's, Target, Staples, etc. have large selections of storage units. Find one that fits your application. Shopping for just the right part is the most frustrating aspect of DIY projects. It takes lots of patience.

Once I had the right tower, I put it on top of the sump cover and traced it with a Sharpie.

IMG_4507.jpg


I then used a jig saw to cut an appropriate sized hole in the cover. A utility or Exacto knife or a strong set of shears would probably work if you don't have a good jig saw with fine tooth blade.
 
Last edited:

Charlutz

Members
To get the filter tower ready for media, we have to cut holes in the bottoms of the drawers so that the water can enter from the top, flow through the media at each level in the tower, then into the sump where it is pumped back into the display tank. A drill or Dremel type rotary tool is good for making the holes. The plastic of the drawers is brittle and conventional drill bits will crack the drawers. I found that a hole saw or a spade bit cut the plastic with minimal cracking. If you do manage to crack the drawer severely, don't panic. There are plenty of plastic baskets available at places like the Dollar Store that you can sit inside the cracked drawer that will do the job and cover your mistake. It'll just cost you some time to find one that fits. Or, you could use a jig saw to open up the bottom of the drawer completely and line it with “egg crate,” the plastic lighting diffuser sold in 2'x4' sheets at Home Depot for about $12.

Drill holes in the drawers that are big enough to allow water to flow freely through the filter trays, but that will support the media inside. I used 1/4” holes for the top two shelves which will hold a filter pad and filter floss, and then slightly larger holes for the next drawer that will hold bio balls. [Since I wrote the article, I've become obsessed with quieting the filter down. I am in the process of drilling much smaller holes in a new storage unit, but this takes a lot of time!]

IMG_4503.jpg


In the bottom drawer, I drilled three large holes in the front to allow the water to flow unrestricted. I'll use this tray to hold pot scrubbies from the Dollar Store ($15 for 90 scrubbies).

IMG_4506.jpg


IMG_4543.jpg

They have a tremendous amount of surface area and because they are not solid like bio balls are more appropriate in a submerged application. Hint: you will need to remove the drawers when drilling the holes. Make sure that you drill the holes for the top shelves in such a way that the water will not flow out the front of the unit and over the top of your sump. I made this mistake and will have to fix it with some silicone and left over plastic sheeting. Learn from my mistake! Also, the plastic shavings will make a mess and melt to the drawer. Do this job in the garage or where you can clean it up easily!

 
Last edited:

Charlutz

Members
In addition to the flow holes, I built in some safety drains for the top two levels. Because you will be pumping several hundred gallons of water per hour through your system, you want to have multiple failsafe systems in case something clogs or the power goes out. Although we all try to do regular maintenance, sometimes life gets in the way and our filter media will clog. What I did was take some 3/4” CPVC pipe and cut a piece about 1/2” long (you could use the 1” PVC if you don't have any CPVC laying around or are not using it to plumb your return. No sense buying 10' just to make the two failsafes. Remember DIY is about adapting!) I then attached it to a coupling ($0.18). I used a 7/8” spade drill bit to drill one hole in each of my top two drawers. I could then insert the CPVC into this hole forming a sort of “chimney.” This way, if I get busy and neglect a water change causing my media to clog, the water level will rise, but then drain through the chimney giving me a margin for error to notice I need to clean my media. This failsafe has saved me more times than I'd like to admit! I put the chimneys in the back corners of my media drawers so that they won't impede opening the drawers. I simply pack the filter floss around it, or cut a small hole in the filter pad to fit it correctly. I later used a hacksaw to cut down the coupling so that the failsafe would become active before the water rose too high.

IMG_4501.jpg

IMG_4502.jpg


Charlutz

Members
We also need to plumb the top of the tower for the water inlet. Most overflows are fitted so that they will attach to 1” PVC pipe. We will need the pipe ($3 for ten feet) a 90 degree threaded elbow($1.29), female PVC nut ($0.35) and a gasket($1). Shopping for the plumbing parts is the single most frustrating work in building your own filter. Home Depot stores do not stock identical material store to store. Sometimes they are not even consistent in which aisle they stock it, so you may have to try several until you find what you need. The elbows will be in the plumbing or tub/toilet repair aisles. The gaskets are also in the tub/toilet repair aisle. For a female nut, I recommend getting the gray PVC which is used for running electrical conduit and is in the electrical aisle. The threads of the gray PVC are straight, rather than tapered like the white, and will cinch up much more snugly to the male threaded end of the elbow. You should also try local hardware stores. After building my inlet, I discovered that it was too tall and I found a better piece at my hardware store. Learn from my mistake!

Once you have the top plumbed, connect it to your drain tubing and secure with a screw clamp ($1.15).


IMG_4499.jpg


IMG_4503.jpg


IMG_4503.jpg


Charlutz

Members
The Return Line

Your return lines will need to be tailored to your pump size. I recommend getting a pump slightly larger than you need for several reasons. First, you will lose some pressure as the water is pumped uphill into the tank – called “head loss.” There will be additional head loss caused by the restrictions in the plumbing, especially the 90 degree elbows. If there is still too much pressure, you can use a valve to adjust it accordingly. Your pump output is only limited by the amount of flow your drain is capable of draining. If your pump exceeds your overflow capacity, it will lead to a flood. Here are some basic drain flow rates based on the diameter of the drain.


1" pipe = approximately 600 GPH
1.25" pipe = approximately 900 GPH
1.5" pipe = approximately 1300 GPH

My return line was designed to fit a MAG 18 pump that is submersible in the sump. I took the pump with me to Home Depot to make sure the fittings would be the right size. The pump should be connected first with flexible tubing to dampen any vibrations and cut down on noise. Home Depot or your local hardware store should have a good selection of adapters with one female threaded end to attach to the outlet of your pump and a barbed end to plug into the tubing. A simple return will follow this sequence Pump -> barbed adapter -> flexible tubing -> barbed adapter -> PVC female adapter PVC pipe -> ball valve -> outlet.


IMG_4545.jpg


Use clamps on your flexible tubing where they attach to the barbed ends. Unlike the drain, the return is under pressure and the clamps must be tightly secured.

Working with PVC or CPVC is very easy. A hacksaw is great for cutting pieces of the appropriate size. After cutting use a gloved hand to pull away the shavings and smooth off the ends. Once you have all your pieces cut, assemble the return without gluing it to make sure everything is where it is supposed to be. Once you glue it, it's permanent. Use purple PVC primer to clean the pipe and PVC glue to assemble. Glue for PVC can be different than for CPVC, so make sure you have the correct one for your application. The purple primer will stain, so use it carefully. Spread glue on both ends of the pipe, let stand for ten seconds, assemble and twist. The pipe will take some time to cure. I usually wait 24 hours before putting it under pressure.

Your return should include one ball valve ($6 from Home Depot in the plumbing aisle).


valve.jpg


Even if your drains allow you to run the pump full open, the valve will come in handy when you are working on the tank and making adjustments to quiet the overflows. Make sure you put the valve in an easily accessible place in your return line. Once I found the correct setting for my valve so as to not overwhelm my overflow drains, I marked it with a Sharpie for future reference. You will need to cut another hole in your sump cover to allow for the return piping. Hint: Put the hole near an outer edge and make a slit in the cover through to the edge. This will allow you to lift the cover off during maintenance and slip it off the return piping.


Charlutz

Members
The Outlet

The outlet is where your return enters the tank. It should be long enough on the tank side so that it can hang on the tank without danger of falling off. I like to use two 90 degree elbows glued into place to make the “hook” over the tank top. I then glue on a very short section of PVC pointed straight down into the tank. To this, I attach but do not glue a 45 degree elbow. I don't use glue so that I can redirect it depending on where I want my circulation. The outlet will eventually become covered with algae so that the white or beige pipe doesn't stand out too much. I painted mine with gray Drylock waterproof paint left over from painting my basement floor. An alternative is Krylon Fusion spray paint.

There is another failsafe that must be incorporated into the outlet. When the pump shuts off during maintenance or a power outage, water will “back siphon” down your return line into your sump. It will continue to flow until air enters the system or the power comes back on. The lower your outlet in the display tank, the more water that will drain. The easiest way to prevent this problem is to drill a small hole in the outlet, just below the water line. When the power shuts off, the back siphon will lower the display tank water level until it reaches the hole, when air will enter and break the back siphon. This simple device works well, but if you have a planted tank you may want to consider another method, like a check valve ($12). When under power, water is drawn into the hole and if there is plant matter floating in the tank, it will clog the air hole and defeat it. A tip for drilling the air hole is to “drill up” so that the hole is angled toward the bottom o f the tank to prevent it from acting like a Venturi valve and creating a bubble stream. Another tip is to start with a small hole and keep making it larger until it does the job. If the hole is too small it may not pull enough air into the system to break the siphon. If it is too large, water may squirt out of it or air may get sucked in.


Charlutz

Members
The Daisy Chain

I wanted a sump capacity of at least 40 gallons for my tank. I liked the 28 gallon container I bought, but needed to connect two of them. This is usually done with bulkheads. Bulkheads can be expensive, but you can make your own. Water needs to flow freely between the two sumps, so I am using 1.5” PVC to connect them. I made my bulkheads with gray conduit PVC and a rubber gasket from the tub/toilet repair aisle at Home Depot. Each bulkhead cost $2. I later found that my local hardware store had a much better selection of gaskets than Home Depot, so don't ignore the small stores. When making a bulkhead, the gasket goes over the flange, or male end, and then rests against the tank wall. Usually, the gasket is inside the tank, but it doesn't have to be, as long as it is on the flange. Wrap the threads of the male end with teflon plumbing tape and cinch it up tight by hand, and then give it a short turn with a wrench. Rubbermaids can be tricky with bulkheads because they tend to twist, so if possible, use a single sump of appropriate size if it is available.


IMG_4542.jpg


IMG_4603.jpg


I later found a great product called Uniseals that worked much better than the DIY bulkheads. You can see my product review here:


Uniseals review thread

So there is my DIY sump and wet-dry filter. If you have any comments, I'd love to hear them, especially if you have any ideas to improve on my design. That is what DIY is all about!
 
Last edited:

UNCLERUCKUS

"THE ALL POWERFUL Q !!
WOW! WELL WRITTEN W/ GREAT PICS TO ILLUSTRATE. NOW EXACTLY HOW HIGH IS THAT WD? LOOKING AT THE PICS MAKE ME WONDER IF I EVEN HAVE ENOUGH HEAD ROOM FOR THE DESIGN.
 

Charlutz

Members
I wrote that article a couple years ago. Filter works great. The microfiber pads keep the water crystal clear and the amount of media (it's setup with double towers) is overkill for the tank. I've made some tweaks to quiet it, but it's much better than the Amiracle setup I had before.
 

RIFT_LAKES_RULE

Member of the Darkside Tang's Rule!
Very good article, I see a couple things I could have incorporated into mine which is basically the same design except I only have sponge material and bioballs. I removed the 4th drawer that you have filter floss in to keep it more compact but overall mine looks similiar. Great job!!!
 

Charlutz

Members
NOW EXACTLY HOW HIGH IS THAT WD? LOOKING AT THE PICS MAKE ME WONDER IF I EVEN HAVE ENOUGH HEAD ROOM FOR THE DESIGN.

Sorry, just noticed I didn't answer this question.:blush: I think the drawer set is about 30" tall plus the inlet pipe on top. The drawer frames come apart, so you could take off the top one, or buy one in a different configuration, etc. There are lots of types. Just need to shop til you find the one that fits your stand.
 
Top